Hello, welcome to my blog!!
For today's card, I'm getting back to my favorite technique, ink blending! I will be doing some ink blending to create a gradient blend. I will be using Distress Oxide Inks for my ink blending and also use it for some subtle stamping with a background stamp. Let's get started!!

I will be doing all of my work on my Tim Holtz Glass Media Mat.
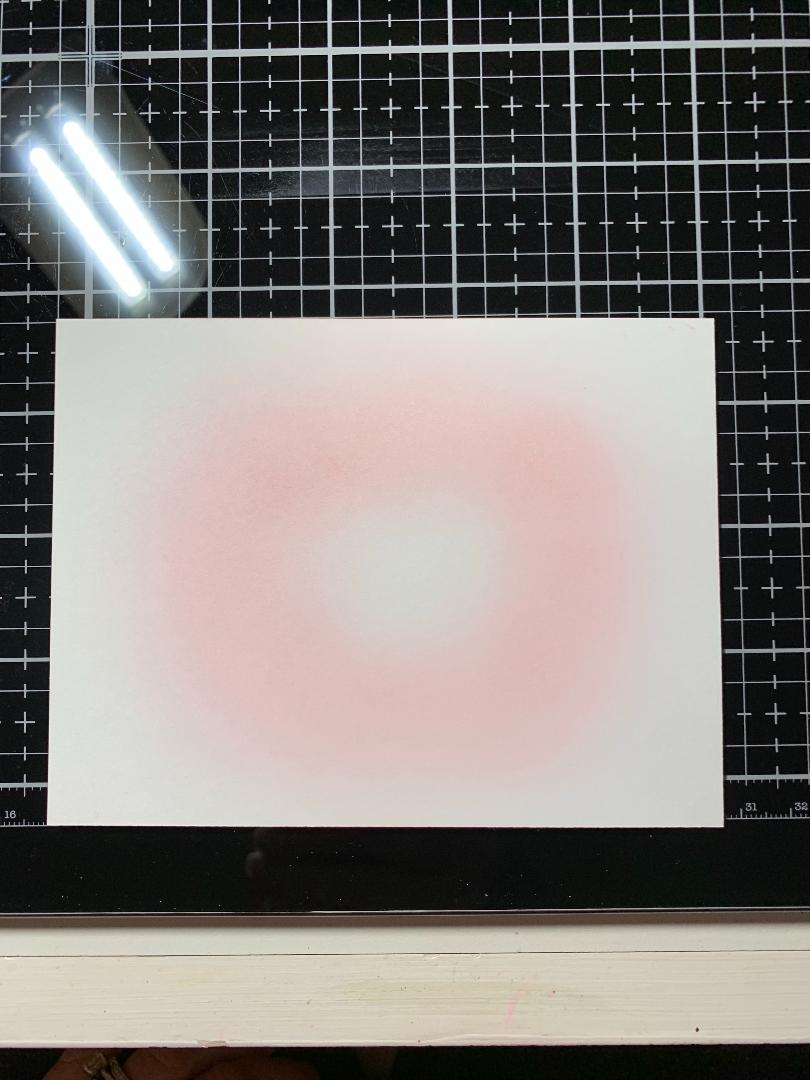
To start, I cut a 4" x 5 1/4" panel out of Neenah White Cardstock using my Tim Holtz Guillotine Paper Trimmer. Using my Blender Brushes, I blend Spun Sugar Distress Oxide Ink onto the center area of my panel, fading out to the very center to create a highlighted area. Next, I blend Worn Lipstick Oxide Ink around and blend into the previous color. The final color Picked Raspberry Distress Oxide Ink is blended around the edges and corners, blending back into the previous color. I then go back with each color and blend into each other to complete my blending.


Next, I take a scalloped die from my Stitched Scalloped Border Dies, place it on the bottom edge of my panel and run it through my Big Shot Die Cut Machine.

Taking Purple Tape, I cover the scalloped edge of my panel (to prevent stamping on the scalloped edge) and place the panel into my MISTI Stamp Positioner. Using my Diamond Tiles Background Stamp, I ink with Spun Sugar Distress Oxide Ink and stamp it onto my panel. Stamping with the lightest color of ink from my panel adds the look of texture and gives interest to the final card. I then adhere my panel to a white card base using Double Sided Tape.


Next, I take my Mega Hello Die with white cardstock and run them through my Big Shot Die Cut Machine three times. Using Liquid Glue, I stack and glue the die cuts together. For my sentiment, I blend Spun Sugar Oxide Ink and Worn Lipstick Distress Oxide Ink onto a scrap piece of paper. I then choose a sentiment from the You Make A Difference Stamp Set and stamp it onto the blended area using Versafine Clair Nocturn Ink. To cut out my sentiment, I use my Sentiment Banner Dies and run through my Big Shot Die Cut Machine.


I add Foam Tape to the back of my hello die and adhere down to my card front. To attach my sentiment, I double up the Foam Tape on each end and attach over the die. I then add Water Droplets using Liquid Glue and this completes my card.


Adding a simple large die cut greeting to a created background is a great way to let the background show through. I contemplated embossing the background stamp with white, stamping in a darker color of ink, but in the end decided to go with the lightest color of ink used on my blended background. It gave just enough interest without the die cut greeting becoming lost on a busy background. I found it interesting that the light color showed up over the center and at the same time it showed up over the darker colors, I loved the results! That is the beauty of Oxide Inks, the chalky - oxide appearance reacts like no other ink I've tried!
If this is the first time visiting my blog, welcome and I hope you return. If you are a returning visitor, thank you so much for your support!
Should you have any questions or comments please leave them in the comments section. I'd love to hear from you and what you thought about today's card.
If you would like to be notified by email each time I post something new to my blog, you can click on the subscribe button at the top of the page. There is also a follow button that you can click on located below my profile if you would like to follow my blog.
Thank you for visiting and I hope you come back soon!
Happy Stamping!!
Jeannie
For today's card, I'm getting back to my favorite technique, ink blending! I will be doing some ink blending to create a gradient blend. I will be using Distress Oxide Inks for my ink blending and also use it for some subtle stamping with a background stamp. Let's get started!!

I will be doing all of my work on my Tim Holtz Glass Media Mat.
To start, I cut a 4" x 5 1/4" panel out of Neenah White Cardstock using my Tim Holtz Guillotine Paper Trimmer. Using my Blender Brushes, I blend Spun Sugar Distress Oxide Ink onto the center area of my panel, fading out to the very center to create a highlighted area. Next, I blend Worn Lipstick Oxide Ink around and blend into the previous color. The final color Picked Raspberry Distress Oxide Ink is blended around the edges and corners, blending back into the previous color. I then go back with each color and blend into each other to complete my blending.


Next, I take a scalloped die from my Stitched Scalloped Border Dies, place it on the bottom edge of my panel and run it through my Big Shot Die Cut Machine.

Taking Purple Tape, I cover the scalloped edge of my panel (to prevent stamping on the scalloped edge) and place the panel into my MISTI Stamp Positioner. Using my Diamond Tiles Background Stamp, I ink with Spun Sugar Distress Oxide Ink and stamp it onto my panel. Stamping with the lightest color of ink from my panel adds the look of texture and gives interest to the final card. I then adhere my panel to a white card base using Double Sided Tape.


Next, I take my Mega Hello Die with white cardstock and run them through my Big Shot Die Cut Machine three times. Using Liquid Glue, I stack and glue the die cuts together. For my sentiment, I blend Spun Sugar Oxide Ink and Worn Lipstick Distress Oxide Ink onto a scrap piece of paper. I then choose a sentiment from the You Make A Difference Stamp Set and stamp it onto the blended area using Versafine Clair Nocturn Ink. To cut out my sentiment, I use my Sentiment Banner Dies and run through my Big Shot Die Cut Machine.


I add Foam Tape to the back of my hello die and adhere down to my card front. To attach my sentiment, I double up the Foam Tape on each end and attach over the die. I then add Water Droplets using Liquid Glue and this completes my card.


Adding a simple large die cut greeting to a created background is a great way to let the background show through. I contemplated embossing the background stamp with white, stamping in a darker color of ink, but in the end decided to go with the lightest color of ink used on my blended background. It gave just enough interest without the die cut greeting becoming lost on a busy background. I found it interesting that the light color showed up over the center and at the same time it showed up over the darker colors, I loved the results! That is the beauty of Oxide Inks, the chalky - oxide appearance reacts like no other ink I've tried!
If this is the first time visiting my blog, welcome and I hope you return. If you are a returning visitor, thank you so much for your support!
Should you have any questions or comments please leave them in the comments section. I'd love to hear from you and what you thought about today's card.
If you would like to be notified by email each time I post something new to my blog, you can click on the subscribe button at the top of the page. There is also a follow button that you can click on located below my profile if you would like to follow my blog.
Thank you for visiting and I hope you come back soon!
Happy Stamping!!
Jeannie
Comments
Post a Comment