Hello, welcome to my blog!!
In today's card project, I will show you how to create an image in an open window using a partial die cutting technique. This is a fun technique that allows you to stamp an image onto the front of your card then create a window using partial die cutting. A portion of the image will be in the window while the rest of the image will be stamped onto the card front. Kind of hard to put into words, much easier to show you. I will be using Gina K. Designs stamps, inks and cardstock. For my coloring, I will be using Zig Clean Color Real Brush Markers. Let's get started!!

To start, I cut a 4" x 5 1/4" panel out of Strathmore Bristol Smooth Cardstock using my Tim Holtz Guillotine Paper Trimmer. I place my panel into my MISTI stamp positioner, prep the panel with my Anti Static Powder Bag and stamp an image from the Signs Of Spring Stamp Set using Embossing Ink. Next, I add Detail Gold Embossing Powder then heat set with my Heat Tool.


Next, I choose a circle die from my Infinity Circles Die Set and place it over my embossed image where I want the window to be, being careful not to place it where it will cut the image and tape it down using Purple Tape.

I then lay my panel onto the bottom cutting plate and place the top cutting plate ONLY over the portion of the die that I want to be cut, with the rest of the die and image hanging out. I then run through my Big Shot Die Cutting Machine.


I lay the die back over the image and lightly trace with a pencil the bottom portion of the die that did not cut, then fussy cut around the pencil line and the rest of my image using Razor Edge Easy Action Shears.


Using my 36 Count Zig Clean Color Real Brush Markers, I start with Light Violet-081 and add small amounts at the base of each petal. I then use my Water Brush to pull the color out toward the end of each petal.


Next, I add Violet-080 and repeat the process, adding a little less so I don't over power the previous color.


Now, I work on the stems and leaves. I start with Pale Green-045 to lay a base. The next color I use is Light Green-041 adding at the base and blended out using my Water Brush. I finish with Olive Green-043.


Next, I need to create a mask for my image so I can ink blend. I stamp the same image onto Masking Magic then fussy cut the entire image out. I peel off the backing and adhere over the colored image. I now do some ink blending using my Blender Brushes. I start with Lemon Drop Ink and blend around the image and window, fading out to the center. I then blend Wild Dandelion Ink around the outside of the panel blending into the previous color.


After my ink blending is finished I remove the mask and with the remaining ink on my brush, I blend into the bottom stems of the flowers to get rid of the white area.


I now create a background for my window. I take a 4" x 5 1/4" white cardstock panel and my cloud stencil (that I've had for 20 years!) and blend using Ocean Mist Ink to create a cloudy background.

Next, I stamp a greeting from the same stamp set onto my blended panel using Amalgam Ink. I attach the cloud panel behind the window panel using Terrific Tape. I then adhere onto a Stormy Sky top folding card base. Using my Jewel Picker Tool, I adhere Water Droplets with Liquid Glue and this finishes my card.


I hope you enjoyed today's card project. I had fun pulling this card together, and hope if you've never tried partial die cutting, that you give it a try! It can be as simple or complex as you'd like.
If this is the first time visiting my blog, welcome and I hope you return. If you are a returning visitor, thank you so much for your support!
Should you have any questions or comments please leave them in the comments section. I'd love to hear from you and what you thought about today's card.
If you would like to be notified by email each time I post something new to my blog, you can click on the subscribe button at the top of the page.
Thank you for visiting and I hope you come back soon!
Happy Stamping!!
Jeannie
In today's card project, I will show you how to create an image in an open window using a partial die cutting technique. This is a fun technique that allows you to stamp an image onto the front of your card then create a window using partial die cutting. A portion of the image will be in the window while the rest of the image will be stamped onto the card front. Kind of hard to put into words, much easier to show you. I will be using Gina K. Designs stamps, inks and cardstock. For my coloring, I will be using Zig Clean Color Real Brush Markers. Let's get started!!

To start, I cut a 4" x 5 1/4" panel out of Strathmore Bristol Smooth Cardstock using my Tim Holtz Guillotine Paper Trimmer. I place my panel into my MISTI stamp positioner, prep the panel with my Anti Static Powder Bag and stamp an image from the Signs Of Spring Stamp Set using Embossing Ink. Next, I add Detail Gold Embossing Powder then heat set with my Heat Tool.


Next, I choose a circle die from my Infinity Circles Die Set and place it over my embossed image where I want the window to be, being careful not to place it where it will cut the image and tape it down using Purple Tape.

I then lay my panel onto the bottom cutting plate and place the top cutting plate ONLY over the portion of the die that I want to be cut, with the rest of the die and image hanging out. I then run through my Big Shot Die Cutting Machine.


I lay the die back over the image and lightly trace with a pencil the bottom portion of the die that did not cut, then fussy cut around the pencil line and the rest of my image using Razor Edge Easy Action Shears.


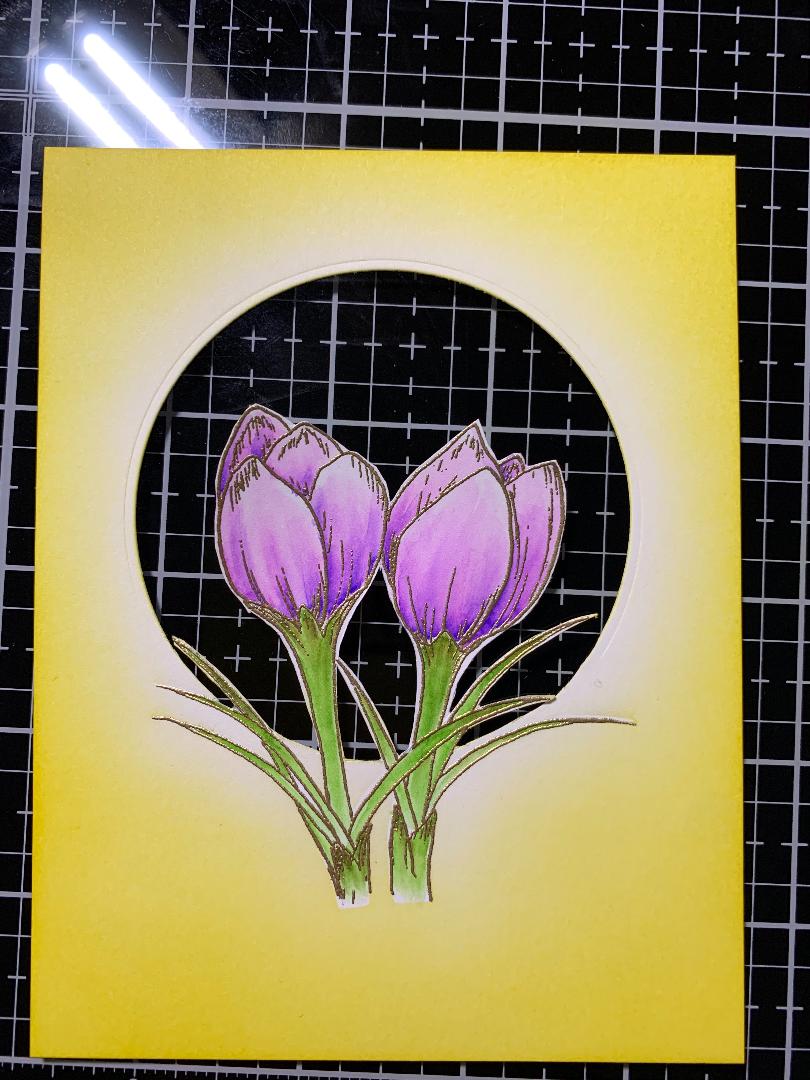
Using my 36 Count Zig Clean Color Real Brush Markers, I start with Light Violet-081 and add small amounts at the base of each petal. I then use my Water Brush to pull the color out toward the end of each petal.


Next, I add Violet-080 and repeat the process, adding a little less so I don't over power the previous color.


Now, I work on the stems and leaves. I start with Pale Green-045 to lay a base. The next color I use is Light Green-041 adding at the base and blended out using my Water Brush. I finish with Olive Green-043.


Next, I need to create a mask for my image so I can ink blend. I stamp the same image onto Masking Magic then fussy cut the entire image out. I peel off the backing and adhere over the colored image. I now do some ink blending using my Blender Brushes. I start with Lemon Drop Ink and blend around the image and window, fading out to the center. I then blend Wild Dandelion Ink around the outside of the panel blending into the previous color.


After my ink blending is finished I remove the mask and with the remaining ink on my brush, I blend into the bottom stems of the flowers to get rid of the white area.

I now create a background for my window. I take a 4" x 5 1/4" white cardstock panel and my cloud stencil (that I've had for 20 years!) and blend using Ocean Mist Ink to create a cloudy background.

Next, I stamp a greeting from the same stamp set onto my blended panel using Amalgam Ink. I attach the cloud panel behind the window panel using Terrific Tape. I then adhere onto a Stormy Sky top folding card base. Using my Jewel Picker Tool, I adhere Water Droplets with Liquid Glue and this finishes my card.


I hope you enjoyed today's card project. I had fun pulling this card together, and hope if you've never tried partial die cutting, that you give it a try! It can be as simple or complex as you'd like.
If this is the first time visiting my blog, welcome and I hope you return. If you are a returning visitor, thank you so much for your support!
Should you have any questions or comments please leave them in the comments section. I'd love to hear from you and what you thought about today's card.
If you would like to be notified by email each time I post something new to my blog, you can click on the subscribe button at the top of the page.
Thank you for visiting and I hope you come back soon!
Happy Stamping!!
Jeannie
I love ALL of your posts. Yours is the only blog I've ever subscribed to because they posts are the most thorough and understandable, with the best staging of pictures. Thank you SO much for all the work you do to make them, and for your beautiful card ideas!!
ReplyDelete(Please know I'm mentally posting this comment every time you post a blog...they're wonderful even if we don't tell you often! ♡)
Aww, thank you so much for your kind words of encouragement, I really appreciate it!!
DeleteI love making my cards and sharing with others!