Hello, welcome to my blog!
In today's card project, I will be using the alcohol lift technique. The alcohol lift ink pad is a clear ink, that when stamped, it picks up and removes alcohol ink from an inked background. You can then use the ink you just picked up to stamp on a piece of cardstock to be used for another card if you'd like. Today, I will be using the ink to lift and remove from a panel I created using alcohol inks.
Let's get started!!

To start, I create a background on Yupo paper, using some pink and red tones of alcohol ink. The colors I use are Shell Pink, Flamingo, Watermelon, Cranberry and Gold Mixative. I put down some drops of ink, then add a little blending solution to the drops of gold mixative then move the ink around using a marker airbrush tool. *This tool is used only to create air to move the ink around. I then set aside to dry completely.


Here is another panel I created not using the gold mixative and adding Wild Plum alcohol ink.

Now it is time to do the lift technique. Using Tim Holtz Alcohol Lift ink, I ink up my Gina K. Designs Petite Flourish background stamp and press it onto my panel using my MISTI stamping tool. *Because I want to stamp my panel to the edges, I like to use removable adhesive on the backside of my panel and move it out about 1/2" from the edges of the MISTI. The MISTI is great for this technique because you can stamp your panel a second time to remove more ink for a bolder image if desired. After stamping with the lift ink, I take a dry, soft cloth and dab up the ink sitting on my image. I then gently buff the stamped image to remove any ink remaining. The image will become more visible after buffing away the ink.


Next, I trim a panel that measures 2 1/2" x 5 1/2" from my inked background. I then mount it off center to a 4" x 5 1/2" panel that I cut from Neenah white cardstock. Now, I want to add some gold trim to my panel. Using my Tim Holtz Guillotine paper trimmer, I trim two strips, about 1/16" from foil cardstock . Laying down a very thin line of Gina K. Designs Connect liquid glue up against the edges of my inked panel, I glue down the thin gold strips and press into place. Next, I adhere to a 4 1/4" x 5 1/2" Gina K. Designs Red Velvet top folding card base.


Now I need to create my greeting for the front of the card. Using my Big Shot die cut machine, I cut a heart shape using Hero Arts Nesting Hearts dies with vellum. Next, I prep my vellum heart with my anti static powder bag and stamp a greeting from Gina K. Designs Scripty Love stamp set using Versamark ink and Brutus Monroe Gilded gold embossing powder. I then heat set using my Wagner heat tool. *Being careful not to warp the vellum I keep the heat moving and use short bursts of heating.


To adhere my heart vellum to my card, I lay out pearls from Lucy's Cards Crystal Collection onto the heart and on the card to decide where I will glue everything down. I then start gluing the pearls into place using my Connect liquid glue. After I let the glue set, I flip over the heart and add glue to the areas of the pearls only. *If I added the glue directly to the vellum, it would show through on the front side. By gluing behind the pearls, it lets me adhere the heart to the card while hiding the glue. Now I can attach the heart to the front of my card. I decide where I want the heart and carefully set it down into place. I then very gently set an acrylic block over the top of the heart and let the glue set.


I finished two of the same card designs using two different backgrounds. The one card has the panel where I used the gold mixative in the background.


This completes my card project for today. Alcohol ink lifting is a fun technique and makes a nice textured looking background. You can use fine detailed or bold stamps, both work great!
I hope you enjoyed this technique. If you are visiting my blog for the first time, welcome and I hope you come back. If you are a return visitor, I thank you for your support!
Should you have any questions or comments, please leave them in the comments section. I'd love to hear from you and what you thought about today's card.
If you would like to be notified by email each time I post a new card project to my blog, you can click on the subscribe button at the top.
I hope you all have a great day and come back soon!
Happy Stamping!!
Jeannie
In today's card project, I will be using the alcohol lift technique. The alcohol lift ink pad is a clear ink, that when stamped, it picks up and removes alcohol ink from an inked background. You can then use the ink you just picked up to stamp on a piece of cardstock to be used for another card if you'd like. Today, I will be using the ink to lift and remove from a panel I created using alcohol inks.
Let's get started!!

To start, I create a background on Yupo paper, using some pink and red tones of alcohol ink. The colors I use are Shell Pink, Flamingo, Watermelon, Cranberry and Gold Mixative. I put down some drops of ink, then add a little blending solution to the drops of gold mixative then move the ink around using a marker airbrush tool. *This tool is used only to create air to move the ink around. I then set aside to dry completely.


Here is another panel I created not using the gold mixative and adding Wild Plum alcohol ink.

Now it is time to do the lift technique. Using Tim Holtz Alcohol Lift ink, I ink up my Gina K. Designs Petite Flourish background stamp and press it onto my panel using my MISTI stamping tool. *Because I want to stamp my panel to the edges, I like to use removable adhesive on the backside of my panel and move it out about 1/2" from the edges of the MISTI. The MISTI is great for this technique because you can stamp your panel a second time to remove more ink for a bolder image if desired. After stamping with the lift ink, I take a dry, soft cloth and dab up the ink sitting on my image. I then gently buff the stamped image to remove any ink remaining. The image will become more visible after buffing away the ink.


Next, I trim a panel that measures 2 1/2" x 5 1/2" from my inked background. I then mount it off center to a 4" x 5 1/2" panel that I cut from Neenah white cardstock. Now, I want to add some gold trim to my panel. Using my Tim Holtz Guillotine paper trimmer, I trim two strips, about 1/16" from foil cardstock . Laying down a very thin line of Gina K. Designs Connect liquid glue up against the edges of my inked panel, I glue down the thin gold strips and press into place. Next, I adhere to a 4 1/4" x 5 1/2" Gina K. Designs Red Velvet top folding card base.


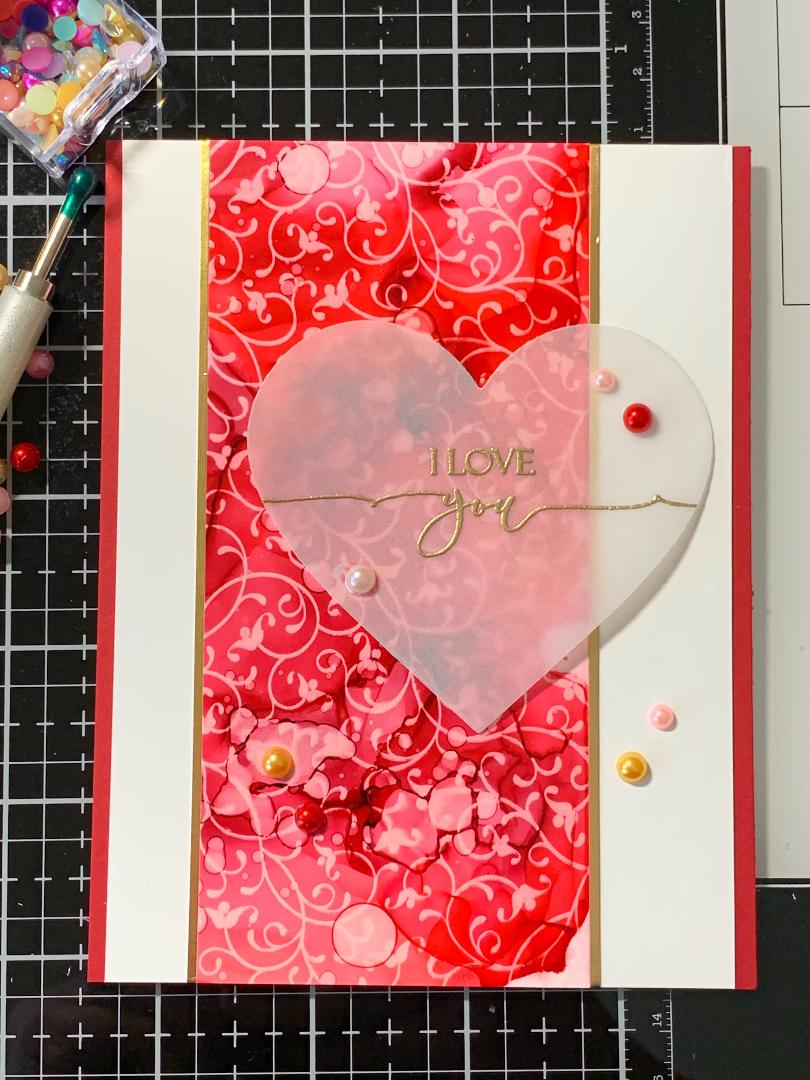
Now I need to create my greeting for the front of the card. Using my Big Shot die cut machine, I cut a heart shape using Hero Arts Nesting Hearts dies with vellum. Next, I prep my vellum heart with my anti static powder bag and stamp a greeting from Gina K. Designs Scripty Love stamp set using Versamark ink and Brutus Monroe Gilded gold embossing powder. I then heat set using my Wagner heat tool. *Being careful not to warp the vellum I keep the heat moving and use short bursts of heating.


To adhere my heart vellum to my card, I lay out pearls from Lucy's Cards Crystal Collection onto the heart and on the card to decide where I will glue everything down. I then start gluing the pearls into place using my Connect liquid glue. After I let the glue set, I flip over the heart and add glue to the areas of the pearls only. *If I added the glue directly to the vellum, it would show through on the front side. By gluing behind the pearls, it lets me adhere the heart to the card while hiding the glue. Now I can attach the heart to the front of my card. I decide where I want the heart and carefully set it down into place. I then very gently set an acrylic block over the top of the heart and let the glue set.


I finished two of the same card designs using two different backgrounds. The one card has the panel where I used the gold mixative in the background.


This completes my card project for today. Alcohol ink lifting is a fun technique and makes a nice textured looking background. You can use fine detailed or bold stamps, both work great!
I hope you enjoyed this technique. If you are visiting my blog for the first time, welcome and I hope you come back. If you are a return visitor, I thank you for your support!
Should you have any questions or comments, please leave them in the comments section. I'd love to hear from you and what you thought about today's card.
If you would like to be notified by email each time I post a new card project to my blog, you can click on the subscribe button at the top.
I hope you all have a great day and come back soon!
Happy Stamping!!
Jeannie
Comments
Post a Comment