
Reverse Stencil Technique


Hello, welcome to my blog!!

I want to start out by thanking everyone for the support and nice comments you all leave for me. I truly appreciate the support of this blog!! I enjoy card making and bringing my creations to you, this wouldn't be possible without your support, so again, thank you!!!

Scrapbookcom continues their Christmas In July sales. To check out the sales, click on the "coupons" tab located on their home page. They have great sales and free gifts... sales change every couple of days so be sure to check back often. I have a banner located on the lower right side of my blog that takes you directly to their store. *Affiliate links used at no additional charge to you, thank you for your support!

Today, I have two cards for you using the reverse stencil technique. Gina used this technique on a past live video of hers so I wanted to try it out. Instead of using black ink with the stencil, I decided to try out some other colors. I will be using a dark blue and a dark brown on today's cards. I will be using Gina K. Design's ink, cardstock and stencils as well as the Master Layouts dies. This is a great technique for any stencils you may already own. Whether bold designs or intricate lines, this technique works with all stencils. Let's get started!!


I will be doing all of today's work on my Tim Holtz Glass Media Mat.

To start, I cut a 4 1/4" x  5 1/2" out of White Cardstock using my Tim Holtz Guillotine Paper Trimmer. Using my Blender Brushes, I blend Wild Dandelion Ink randomly onto my panel, fading out a bit around the edges of the ink. Next, I blend Blue Lagoon Ink randomly, again fading out a bit and blending into the edges of the surrounding color. For my final color, I blend Wild Lilac Ink to the remainder of the panel, fading back into the surrounding colors. *Fading out helps to create a seamless blend when blending colors together.


After my blending is complete, I use Purple Tape to adhere my Water Droplets Stencil to the panel and onto my glass mat. Using a Jumbo Round Sponge Dauber, I blend In The Navy Ink over the entire stencil, covering up all the colored ink. I then remove the stencil to reveal the bright, beautiful colors. Next, I take the smaller rectangle die from the Master Layouts 1 Die Set and cut out of my stenciled panel, running them through my Big Shot Die Cut Machine. *FYI, the navy ink does stain the stencil a bit. I used Dawn dish soap and scrubbed the stencil to clean it. 


Using the biggest rectangle die from the Master Layouts 1 Die Set I cut out of Black Onyx Cardstock, running them through my Big Shot. I then adhere my stenciled panel onto the black panel using Terrific Tape then mount onto a Wild Lilac Cardstock card base.


Using the oval die from the Master Layouts 1 Die Set, I cut out of Wild Lilac Cardstock, running them through my Big Shot. I then add Adhesive Dot Runner to the back of the oval die cut and place into my MISTI Stamp Positioner. I choose a greeting from the Fancy Greetings Stamp Set and stamp onto the oval using Black Onyx Ink.


Taking the scalloped oval die and the smaller oblong oval die from the Master Layouts 1 Die Set, I cut out of Black Onyx Cardstock, running them through my Big Shot


Using Liquid Glue, I adhere my oval die cut to the oval scalloped die cut. I then adhere the oblong oval die cut onto the front of my card using Liquid Glue. *I like using liquid glue to adhere pieces that may need a little "shifting" to center. The liquid glue allows time to get the pieces into the right position before the glue dries. 


Next, I add Foam Tape to the top and bottom of the greeting then center over the black strip onto the card front. I use Liquid Glue to add some Water Droplets and this completes my card.


My second card was made with the exact same process, using all of the same dies. The colors used on this card were Sweet Mango Ink, Lipstick Ink and Coral Reef Ink. I used the Thick Brush Stencil, and blended Dark Chocolate Ink over the colors. I used a greeting from the Hearty Greetings Stamp Set. The color of cardstock used was Sweet Mango Cardstock. *Below are three pictures of my blending.


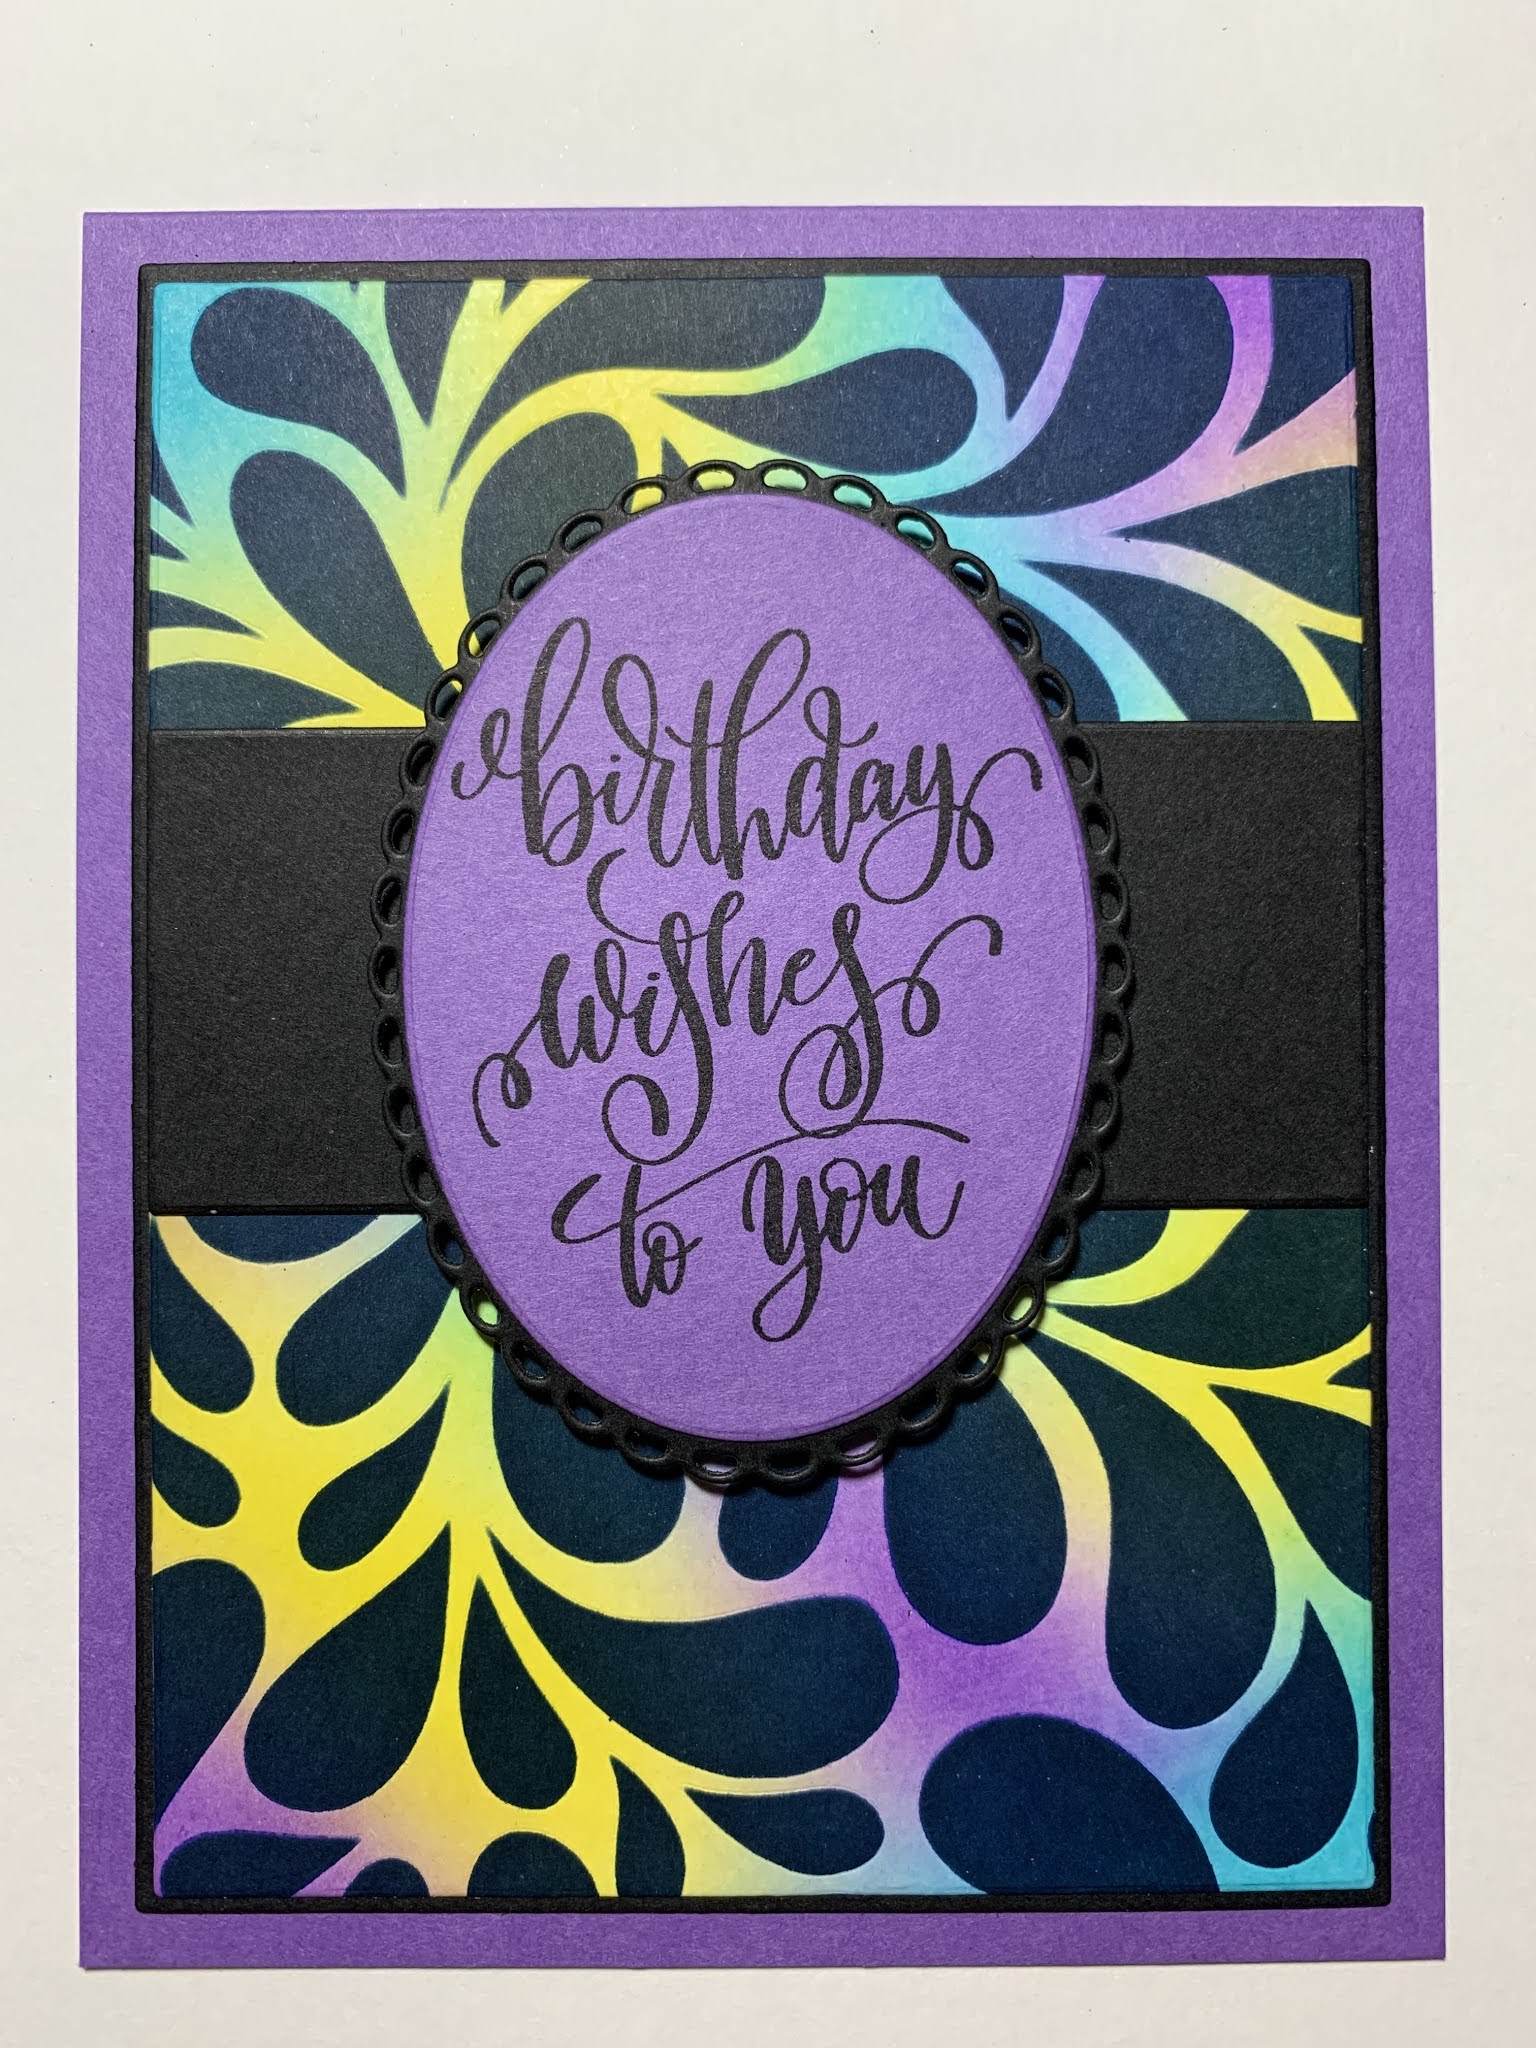
I hope you enjoyed today's cards, Gina comes up with lots of great techniques! Whether it's light colored inks, bright colors or even earth tone colors this technique works great with all colors! Normally black ink is used over the stencil, but I thought I'd see what kind of results I would get using other dark colors. It's hard to capture in theses pictures, but the navy against the bright colors is just beautiful. The dark brown over the orange tones reminds me of a giraffe print! I think the dark brown against fall colors would be gorgeous!


If this is the first time visiting my blog, welcome and I hope you return. If you are a returning visitor, thank you so much for your support!

Should you have any questions or comments please leave them in the comments section. I'd love to hear from you and what you thought about today's card.

If you would like to be notified by email each time I post something new to my blog, you can click on the subscribe button at the top of the page. *Be sure to verify your subscription through the email link to activate. There is also a follow button that you can click on located below my profile if you would like to follow my blog.

Thank you for visiting and I hope you come back soon!

Happy Stamping and God bless!!

Jeannie

Comments

  1. Very cool! Love your color combos.

    ReplyDelete
  2. This is great. You really explained this step by step and for a person new to card making this is so helpful. I also like that you mention the products you are using,there are so many out there it is confusing to a new crafter

    ReplyDelete
    Replies
    1. Thank you so much!! I'm happy you found my blog helpful, welcome to the wonderful world of card making!

      Delete

Post a Comment

Popular posts from this blog

Shadow Stamping With Stencils

Hello, welcome to my blog!! ***I wanted to let everyone know that Scrapbook.com has kicked off Freebie February!! Every couple of days they will be offering free items along with great sales! Check often as the sales will be frequently changing. I have placed a store logo on the front page of my blog just down below my profile that brings you directly to their store!    *I know die cut machines can be a bigger investment, but if you are in need of one and looking for a good price, Scrapbook.com has some really good prices on Big Shots -  stand alone  machines and bundles.   Today's card project is similar to yesterday's blog post using the shadow stamping technique, but today, I will be using a stencil. I will be using kraft cardstock as well as black cardstock. This is a fun technique to use on any color of cardstock. I wanted to show the look on a light colored cardstock vs a dark color. The key to using any color of cardstock is to first lay down white pigment ink follo

Love & Birthday Wishes - A Little Love Layering Stencils

  Hello, welcome to my blog!!  I want to start out by thanking everyone for the support and nice comments you all leave for me. I truly appreciate the support of this blog!! I enjoy card making and bringing my creations to you, this wouldn't be possible without your support, so again, thank you!! *Affiliate links are used at no additional cost to you. When you purchase products through my links I receive a small commission from these sales, thank you so much for your support, it is greatly appreciated!! For everyone that has been waiting for the A Little Love Layering Stencil Bundle - from Gina K. Designs, it is now back in stock!!! ***This "Love die" is also available for purchase on it's own! Love And Shadow Die Also back in stock are the Blending Brushes !! I used the stencil bundle to create today's card by doing simple blending and adding dimension with stacked die cuts. I love the many color combinations that can be used with this set! I love using gray to

Embossing With Stencils

Hello, welcome to my blog! Today's card project focuses on heat embossing with stencils. Stencils are great for ink blending and are economical. Did you know you can also heat emboss with your stencils? I am showing an example of white heat embossing, but you could also ink blend your stencil then heat emboss with clear embossing powder, if you don't mind getting your embossing pad dirty. Some people have a clean embossing pad dedicated for embossing only, and another embossing pad that they use for different techniques that may get the pad dirty. Let's get started!! To start, I cut a 4 1/4" x 5 1/2" white Neenah cardstock panel using my Tim Holtz Guillotine paper trimmer. I add Gina K. Designs Adhesive Dot Runner  to the corners on the back side of my white card panel to temporarily hold it down onto my Tonic Studios Tim Holtz Glass Media Mat . Next, I prep my panel with my Anti Static powder bag. I then place my Gina K. Designs Water Droplets stencil