
Christmas In July Tags!


Hello, welcome to my blog!!

I want to start out by thanking everyone for the support and nice comments you all leave for me. I truly appreciate the support of this blog!! I enjoy card making and bringing my creations to you, this wouldn't be possible without your support, so again, thank you!!!

Scrapbookcom continues their Christmas In July sales. To check out the sales, click on the "coupons" tab located on their home page. They have great sales and free gifts... sales change every couple of days so be sure to check back often. Right now, while supplies last they have an adorable chubby penguin stamp set for the free gift! I have a banner located on the lower right side of my blog that takes you directly to their store. *Affiliate links used at no additional charge to you, thank you for your support!

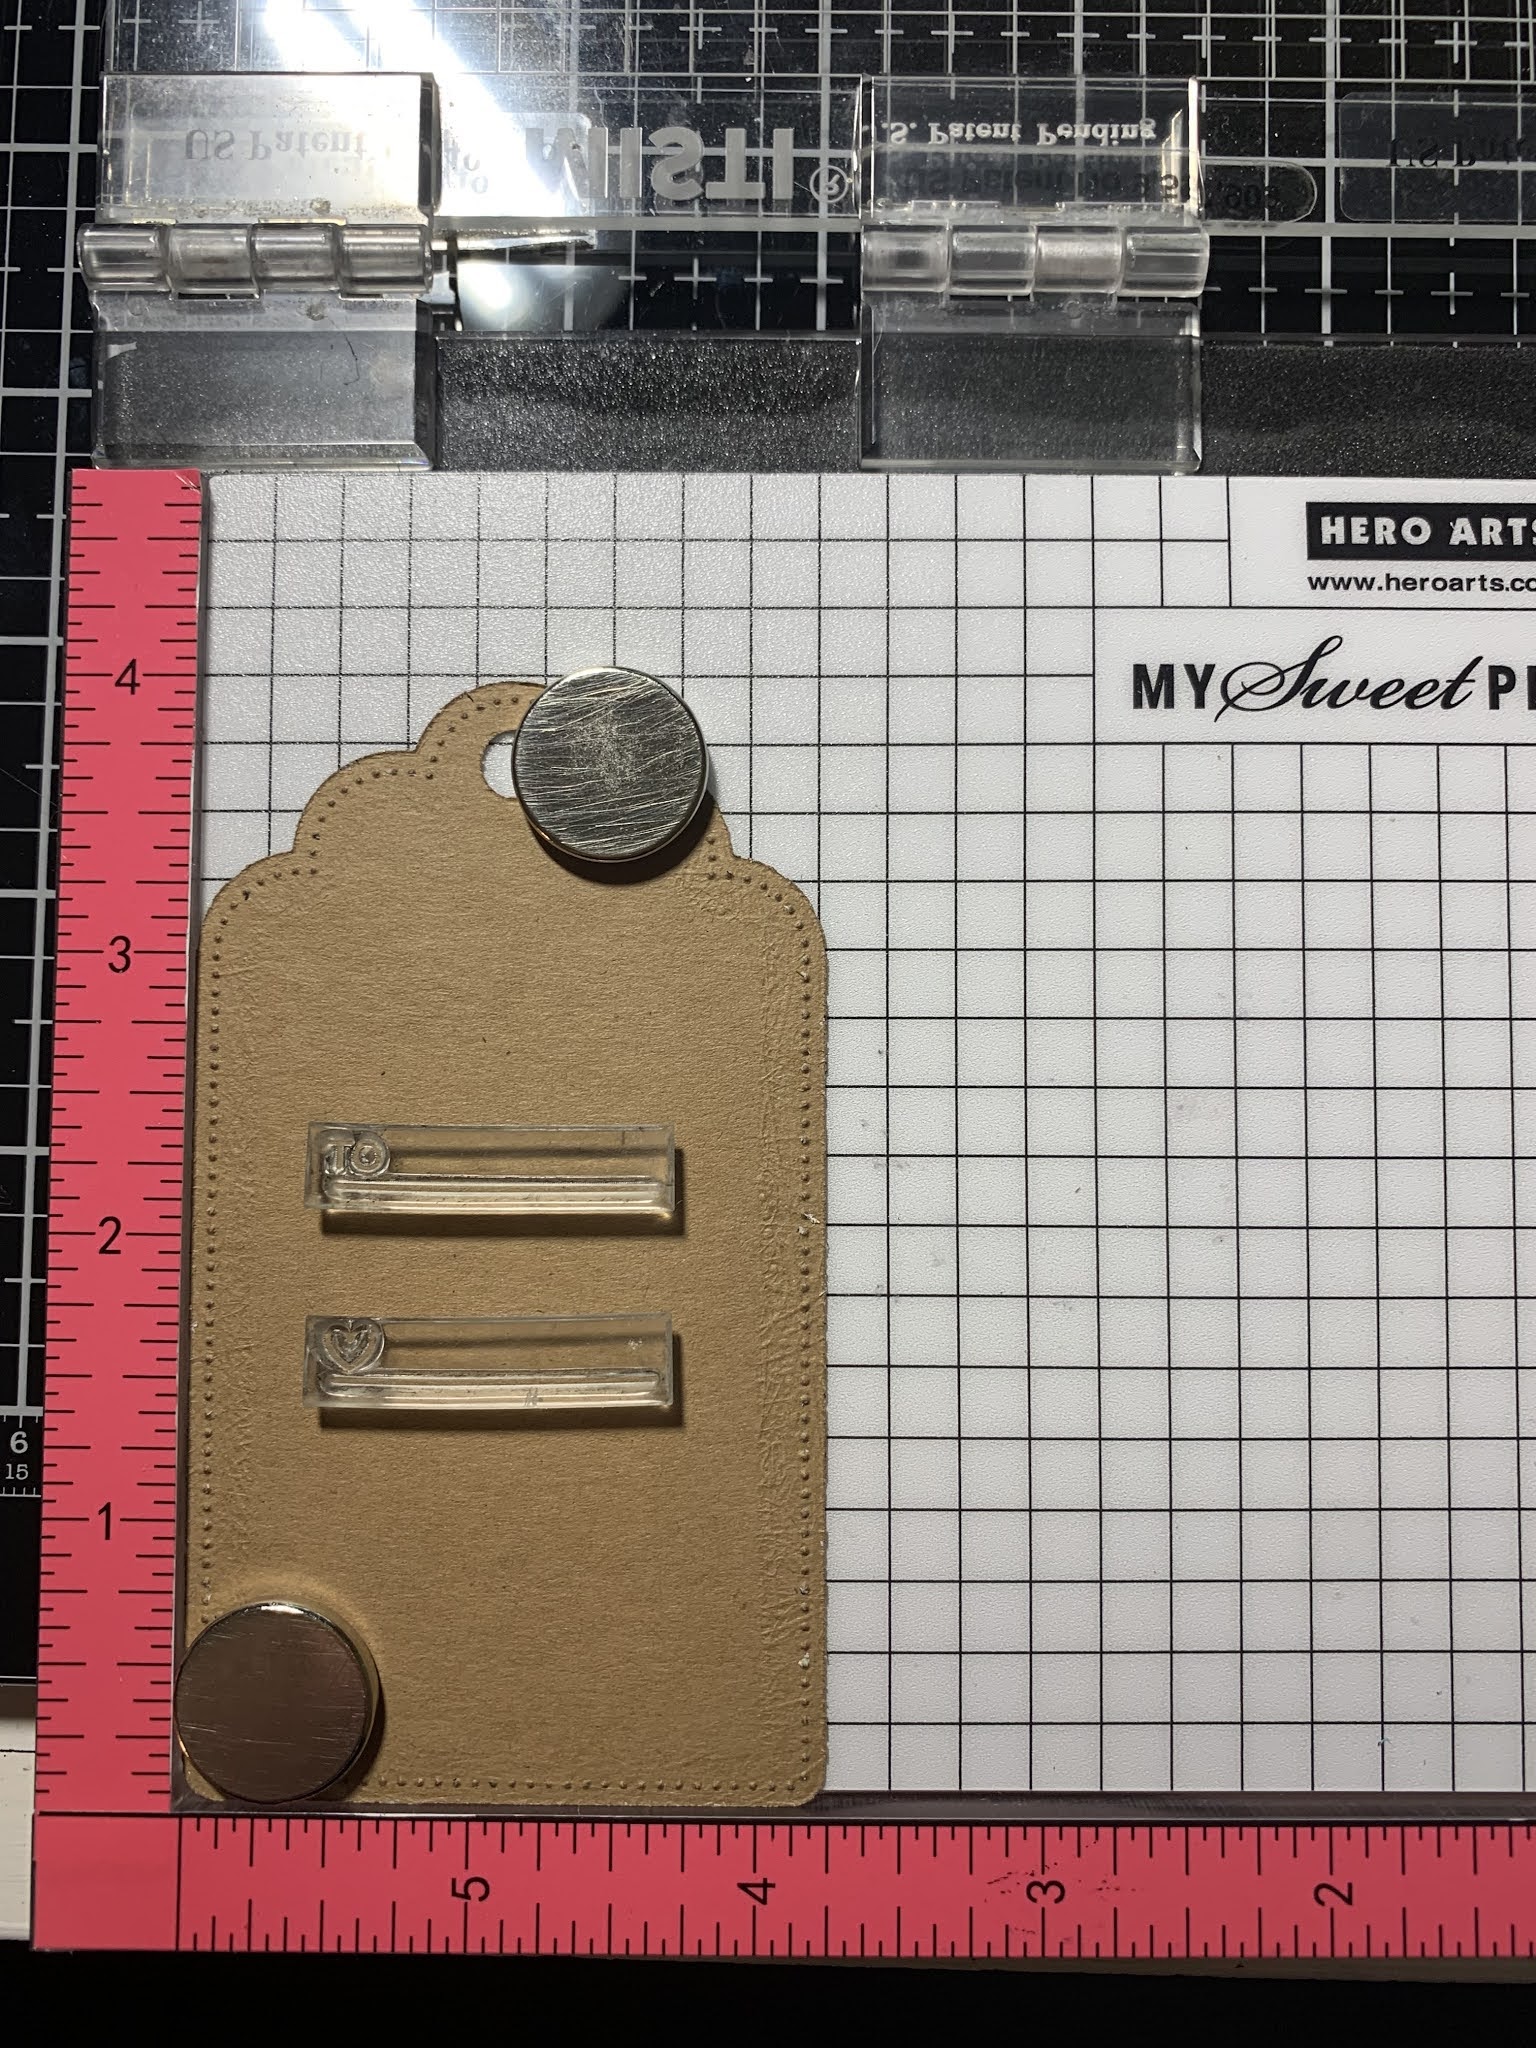
Welcome back to day three of Christmas In July! Today is all about tags! Who doesn't like hanging a handmade tag on gifts, including gift bags? With so many dies and stamp sets available geared towards tags, the possibilities are endless! You can purchase tags already cut, or use a die to cut your own in any color. I will be using a tag die set from Gina K. Designs to cut my own tags. I prefer kraft colored tags myself, but every once in a while I like to use a colored cardstock for my base. I also love to white wash my tags for an old fashioned vintage look, which I will be showing you today. I will be using both dies and stamps to adorn my tags, including a fun shaker tag! Let's get started!!


I will be doing all of my work today on my Tim Holtz Glass Media Mat.

To start, I take the biggest die from the Decorative Tag Die Set and cut out of different colors of cardstock, running them through my Big Shot Die Cut Machine and set them aside.

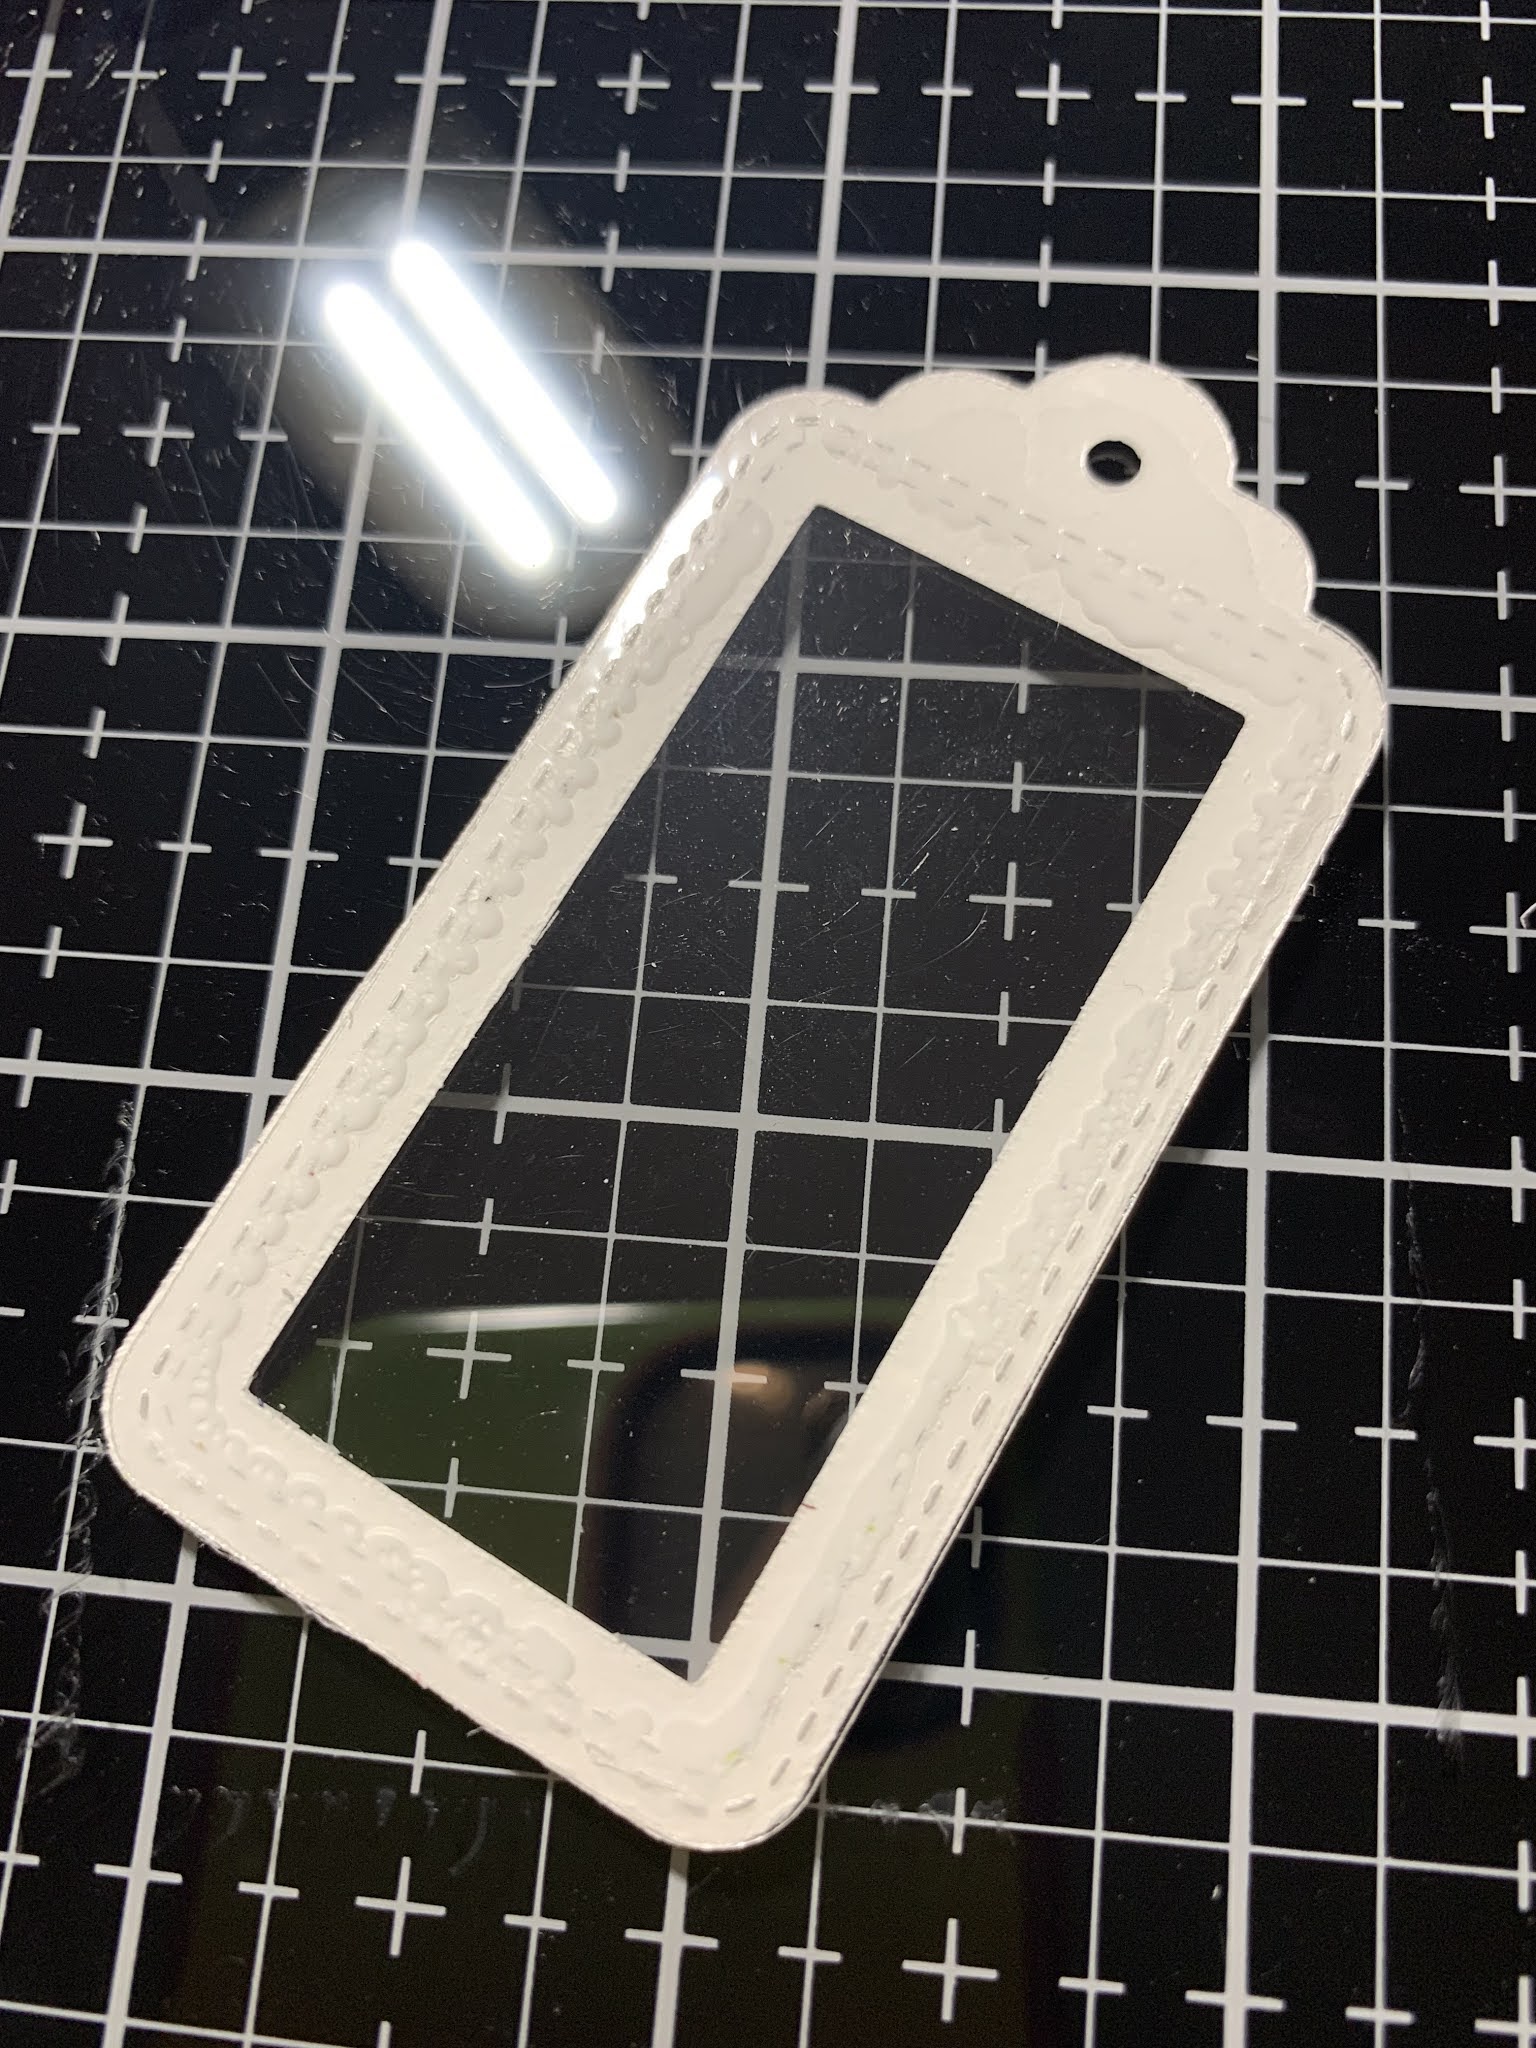
For my first tag, to create a decorative circle frame, I take the smallest circle from the Reverese Stitched - Scalloped Circle Windows Die Set along with a plain circle die from the Infinity Circles Die Set that fits right around my scalloped die. I place the two dies cut side down then adhere them together using Purple Tape. I cut out of white cardstock, running them through my Big Shot. Not knowing exactly which colors I want or how many, I end up die cutting several colors along with the middle sized circle from the same die set. *The reason I add the infinity circle die around the scalloped circle die is to create a frame. The scalloped die when used alone will only cut out a window, for this tag I wanted a frame. After all of my frames are cut, I remove the tape and only use the infinity circle die to cut out some plain circles for backers to my frames.


Using Liquid Glue, I attach the Sea Glass Cardstock frame to the Kraft Cardstock circle die cut.


Next, I take the holly and berry dies from the Holiday Lights Die Set and cut out of Key Lime Cardstock and Red Velvet Cardstock, running them through my Big Shot. To add a little shading to the holly, I blend Crushed Olive Distress Ink onto the leaves using my Blender Brush. I then use Liquid Glue and adhere the berries onto the holly leaves.


For the holly and berries die cut, I add a Foam Square to the back and mount it onto the circle die. I then use Liquid Glue and adhere the other two holly leaves.


I take one of the Paper Bag Cardstock tags (that I cut earlier) and place it into my MISTI Stamp Positioner. Taking the to and from stamps from the Say What Christmas Critters Stamp Set, I line them up on the back of the tag then stamp them using Versafine Clair Nocturn Ink.


Using my MISTI, I stamp the front side of the same tag with a greeting from the same stamp set using the same ink. After my stamping is done I use Liquid Glue and adhere my circle die cut onto my tag.


I decide to change the color of the frame and go with white instead. I add Liquid Glue and adhere over the blue frame. Using a White Gel Pen, I add a couple of highlights to the berries. I tie a piece of jute from my stash through the hole at the top and this completes my first tag.


For my second tag, I use the string of lights die to cut out of Paper Bag Cardstock, and use the bulb die to cut out of Glitter Cardstock, both from the Holiday Lights Die Set, running them all through my Big Shot.


I take a Kraft Cardstock tag and place it into my MISTI. I temporarily place the lights over the tag to determine my sentiment placement. I remove the lights and stamp my sentiment from the Tiny Tag Sayings Stamp Set using Versafine Clair Nocturn Ink.


Using Liquid Glue, I adhere the two string of lights die cuts to my tag. I then glue the glitter bulb die cuts onto the bulbs and cut off all the overhang. I add a frilly red string through the hole at the top and this completes my second tag.


For my third tag, I squirt a small amount of white acrylic paint onto my Glass Mat and spray with a little water using my Distress Sprayer. I mix the paint and water then use a sponge to pick up the paint. Using light strokes, I go back and forth over a Paper Bag Cardstock tag. I want to add a whitewash to the tag but not cover it completely, I like to let some of the tag color show through. 


Next, I take the Snowflake 4 Die to cut out of Paper Bag Cardstock. I then take the Snowflake 1 Die to cut out of Dusty Rose Cardstock and finally use a die from the Mini Snowflakes Die Set to cut out of Sea Glass Cardstock, running them all through my Big Shot. *When cutting out the snowflakes, I use a Metal Adaptor Plate because these dies are so intricate. One or two pieces of cardstock under the bottom cutting plate could also be used in place of the adaptor plate.


Using Liquid Glue I attach the biggest snowflake to my tag. For the middle sized snowflake, I add a Foam Circle to the back then place over the center of the previous snowflake. I then adhere the smallest snowflake using Liquid Glue.


Next, I place the tag into my MISTI. I choose a greeting from the Scripty Holiday Stamp Set and stamp the bottom of my tag using Versafine Clair Nocturn Ink. I tie some jute through the hole at the top and this completes my third tag.


For my fourth tag, I start by cutting frames and backers out of Neenah White Cardstock and one backer out of Acetate using the dies from the Say What Gift Tags Die Set, running them all through my Big Shot.


Using Liquid Glue I adhere the acetate backer to the back of one of the frames, this creates my window. I then glue four additional frames over the acetate to create my shaker well. *Instead of using four additional frames, a frame could also be cut out of foam to create the well. With the edges being thinner, I find it easier to stack and glue frames together rather than fuss with the foam.


Next, I stamp the back of a white backer with Versafine Clair Nocturn Ink and glue it onto a Sea Glass Cardstock backer and set aside. *I decided I wanted a blue background for the inside of my shaker. 


Taking a white backer, I place it into my MISTI and stamp a sentiment from the Say What Christmas Critters Stamp Set towards the top using Versafine Clair Nocturn Ink. *In hindsight, I would have stamped the sentiment down a little further. I then take the speech bubble die from the Say What Gift Tags Die Set and place it just below the sentiment then run them through my Big Shot. I use Liquid Glue and attach to the top of the blue backer.


To create a snow drift, I use a die from the Stitched Hillside Boarders Die Set and cut out of white cardstock, running them through my Big Shot. I then trim it down and glue it onto the bottom of the blue backer using Liquid Glue.


To stamp an image, I place a scrap piece of white cardstock into my MISTI. I choose an image from the Say What Christmas Critters Stamp Set and stamp it using Amalgam Obsidian Black Ink. I use the coordinating die from the Say What Christmas Critters Die Set and cut the image out running them through my Big Shot. I then color my image and add Novu Aqua Shimmer Glitter Gloss for a little sparkle over the white, uncolored areas. 


I now add some tiny star sequins from my stash into the well of my frame then adhere the backer over the well using Liquid Glue. To add a little sparkle to my tag, I cut the frame out of Glitter Cardstock, running them through my Big Shot and glue it over the white frame using Liquid Glue. I add a Foam Circle to the back of my image and mount it onto the front of my tag. I add some bakers twine through the hole at the top and this completes my fourth and final tag.


I hope you enjoyed these tags and learned how easy and fun they are to create! Adding a handmade tag to your gifts is sure to put a smile on the recipients face! Come back tomorrow for another fun Christmas card as Christmas In July continues!!


If this is the first time visiting my blog, welcome and I hope you return. If you are a returning visitor, thank you so much for your support!

Should you have any questions or comments please leave them in the comments section. I'd love to hear from you and what you thought about today's card.

If you would like to be notified by email each time I post something new to my blog, you can click on the subscribe button at the top of the page. *Be sure to verify your subscription through the email link to activate. There is also a follow button that you can click on located below my profile if you would like to follow my blog.

Thank you for visiting and I hope you come back soon!

Happy Stamping and God bless!!

Jeannie

Comments

Popular posts from this blog

Shadow Stamping With Stencils

Hello, welcome to my blog!! ***I wanted to let everyone know that Scrapbook.com has kicked off Freebie February!! Every couple of days they will be offering free items along with great sales! Check often as the sales will be frequently changing. I have placed a store logo on the front page of my blog just down below my profile that brings you directly to their store!    *I know die cut machines can be a bigger investment, but if you are in need of one and looking for a good price, Scrapbook.com has some really good prices on Big Shots -  stand alone  machines and bundles.   Today's card project is similar to yesterday's blog post using the shadow stamping technique, but today, I will be using a stencil. I will be using kraft cardstock as well as black cardstock. This is a fun technique to use on any color of cardstock. I wanted to show the look on a light colored cardstock vs a dark color. The key to using any color of cardstock is to first lay down white pigment ink follo

Love & Birthday Wishes - A Little Love Layering Stencils

  Hello, welcome to my blog!!  I want to start out by thanking everyone for the support and nice comments you all leave for me. I truly appreciate the support of this blog!! I enjoy card making and bringing my creations to you, this wouldn't be possible without your support, so again, thank you!! *Affiliate links are used at no additional cost to you. When you purchase products through my links I receive a small commission from these sales, thank you so much for your support, it is greatly appreciated!! For everyone that has been waiting for the A Little Love Layering Stencil Bundle - from Gina K. Designs, it is now back in stock!!! ***This "Love die" is also available for purchase on it's own! Love And Shadow Die Also back in stock are the Blending Brushes !! I used the stencil bundle to create today's card by doing simple blending and adding dimension with stacked die cuts. I love the many color combinations that can be used with this set! I love using gray to

Embossing With Stencils

Hello, welcome to my blog! Today's card project focuses on heat embossing with stencils. Stencils are great for ink blending and are economical. Did you know you can also heat emboss with your stencils? I am showing an example of white heat embossing, but you could also ink blend your stencil then heat emboss with clear embossing powder, if you don't mind getting your embossing pad dirty. Some people have a clean embossing pad dedicated for embossing only, and another embossing pad that they use for different techniques that may get the pad dirty. Let's get started!! To start, I cut a 4 1/4" x 5 1/2" white Neenah cardstock panel using my Tim Holtz Guillotine paper trimmer. I add Gina K. Designs Adhesive Dot Runner  to the corners on the back side of my white card panel to temporarily hold it down onto my Tonic Studios Tim Holtz Glass Media Mat . Next, I prep my panel with my Anti Static powder bag. I then place my Gina K. Designs Water Droplets stencil