
Flower Garden Bold Prints Distress Ink Watercolor


Hello, welcome to my blog!!

I want to start out by thanking everyone for the support and nice comments you all leave for me. I truly appreciate the support of this blog!! I enjoy card making and bringing my creations to you, this wouldn't be possible without your support, so again, thank you!!!

Scrapbookcom continues their Christmas In July sales. To check out the sales, click on the "coupons" tab located on their home page. They have great sales and free gifts... sales change every couple of days so be sure to check back often. I have a banner located on the lower right side of my blog that takes you directly to their store. *Affiliate links used at no additional charge to you, thank you for your support!

Today's card is made using a 6 x 6 background stamp from Hero Arts. I will be water coloring the stamped images using regular Distress Inks and water. You do not need any watercolor experience at all for today's water coloring. I wanted to show a technique that anyone can do regardless of experience. There is not a right or wrong way to do this, all I am doing is laying down color. I will only be using part of my colored panel in today's card, and will save the rest of it for a future project. A quick note, the watercolor cardstock I use is Canson XL 140 lb. I purchase mine at Walmart for $5.97!!! It is a 9 x 12 pad and includes 30 sheets. I know other places sell this for a lot more so I just wanted to let you know in case the cost is an issue. I will post a picture of it below. Ok, Let's get started!!


I will be doing all of my work today on my Tim Holtz Glass Media Mat.

To start, I cut a 6" x 6" panel out of watercolor cardstock (Pictured below) using my Tim Holtz Guillotine Paper Trimmer. Next, I add Dot Adhesive Runner to the back of my panel and place it into my MISTI Stamp Positioner. I prep the panel using my Anti Static Powder Tool, then stamp the panel using the Flower Garden Bold Prints background stamp using Versamark Embossing Ink. I then add White Embossing Powder  and heat set with my Heat Tool. *Because of the texture of the cardstock, I ink and stamp my panel 3 times to get good coverage.


Using the white part of my Glass Mat, I press Weathered Wood Distress Ink onto the glass, this will be my palette for each color I use. I then spray the ink with my Distress Sprayer filled with clean water. 


Before adding any ink, I spray my embossed panel with clean water. This wets the panel which will allow the ink to move freely and will also dilute the ink a bit giving me a nice light colored wash. *I'm adding ink to the background to not only give it a little color, but to also allow the white embossed images to show up better. Without any ink, the images that are not colored would be lost in the white background.


Taking a bigger paintbrush, I dip it into clean water to wet the bristles then run it through the ink on my Glass Mat to pick up color. I then brush it over my panel until the panel is covered in a light wash of ink. To speed up the drying time I dry the panel with my Craft Tool. I hold the heat higher up from the panel and keep it moving as I do not want the heat to mess with my embossing. *I like to use my craft tool instead of my embossing heat tool as the heat isn't directed heat, it is defused heat. When you keep the heat moving it will dry the panel without reheating the embossed areas.


Once my panel is dry, I clean up my palette and now press Worn Lipstick Distress Ink onto the glass and again spray with water. I pick up some ink using a small wet paintbrush and start to add ink to some of the three petal flowers. *You can see how wet the color is. As it dries, the water will soak into the cardstock and the color will stay on top. 


Next, I press Speckled Egg Distress Ink onto the glass, spray with water and repeat the process. I paint the remaining three petal flowers with this color.


Next, I press Scattered Straw Distress Ink onto the glass, spray with water and add ink to the two petal flowers.


I now press Shabby Shutters Distress Ink onto the glass, spray with water and add ink to the big leaves.


The two petal flowers and big leaves look too similar in color to me, so I press Wild Honey Distress Ink onto the glass, spray with water then add ink over the previous color on the two petal flowers to make it more of a brighter yellow.


For my final color, I press Weathered Wood Distress Ink onto the glass, spray with water and add ink to all of the small leaves on the panel. *To darken the colors, I could have gone over with another layer of ink but decided not to as I wanted a softer look.


After all of my coloring is complete, I cut a section out of my panel measuring 2 1/2" x 5 1/2" using my Guillotine Paper Trimmer. I then adhere my panel onto a Soft Stone Cardstock card base using Double Sided Tape.


Using Liquid Glue, I run a line of glue against both edges of my panel and adhere a 1/16" strip of Storm Cloud Cardstock, pressing into place.


Using a die from the Phrase Builder: Sending Die Set I cut out of Storm Cloud Cardstock two times and once out of Vellum using the shadow die, running them through my Big Shot Die Cut Machine. I then stack and glue the two die cuts together using Liquid Glue then adhere to the shadow die cut.


Before mounting my die cut onto my card front, I cut an additional two die cuts out of the same cardstock, stack and glue them together the glue to the back of my greeting lining up the letters. *I like to add dimension behind my greeting anytime I use vellum so that the vellum doesn't lay flat against my card. I now mount over my panel using Liquid Glue.


Next, I choose a sentiment from the Heartfelt Sentiments Stamp Set and stamp onto a scrap piece of Soft Stone Cardstock with Versafine Clair Nocturn Ink using my MISTI.


I then cut my sentiment out using a die from the Sentiment Banners Die Set, running them through my Big Shot, add Foam Squares to the back and mount just under my greeting. With my Jewel Picker I add pearls from my stash using Liquid Glue and this completes my card.


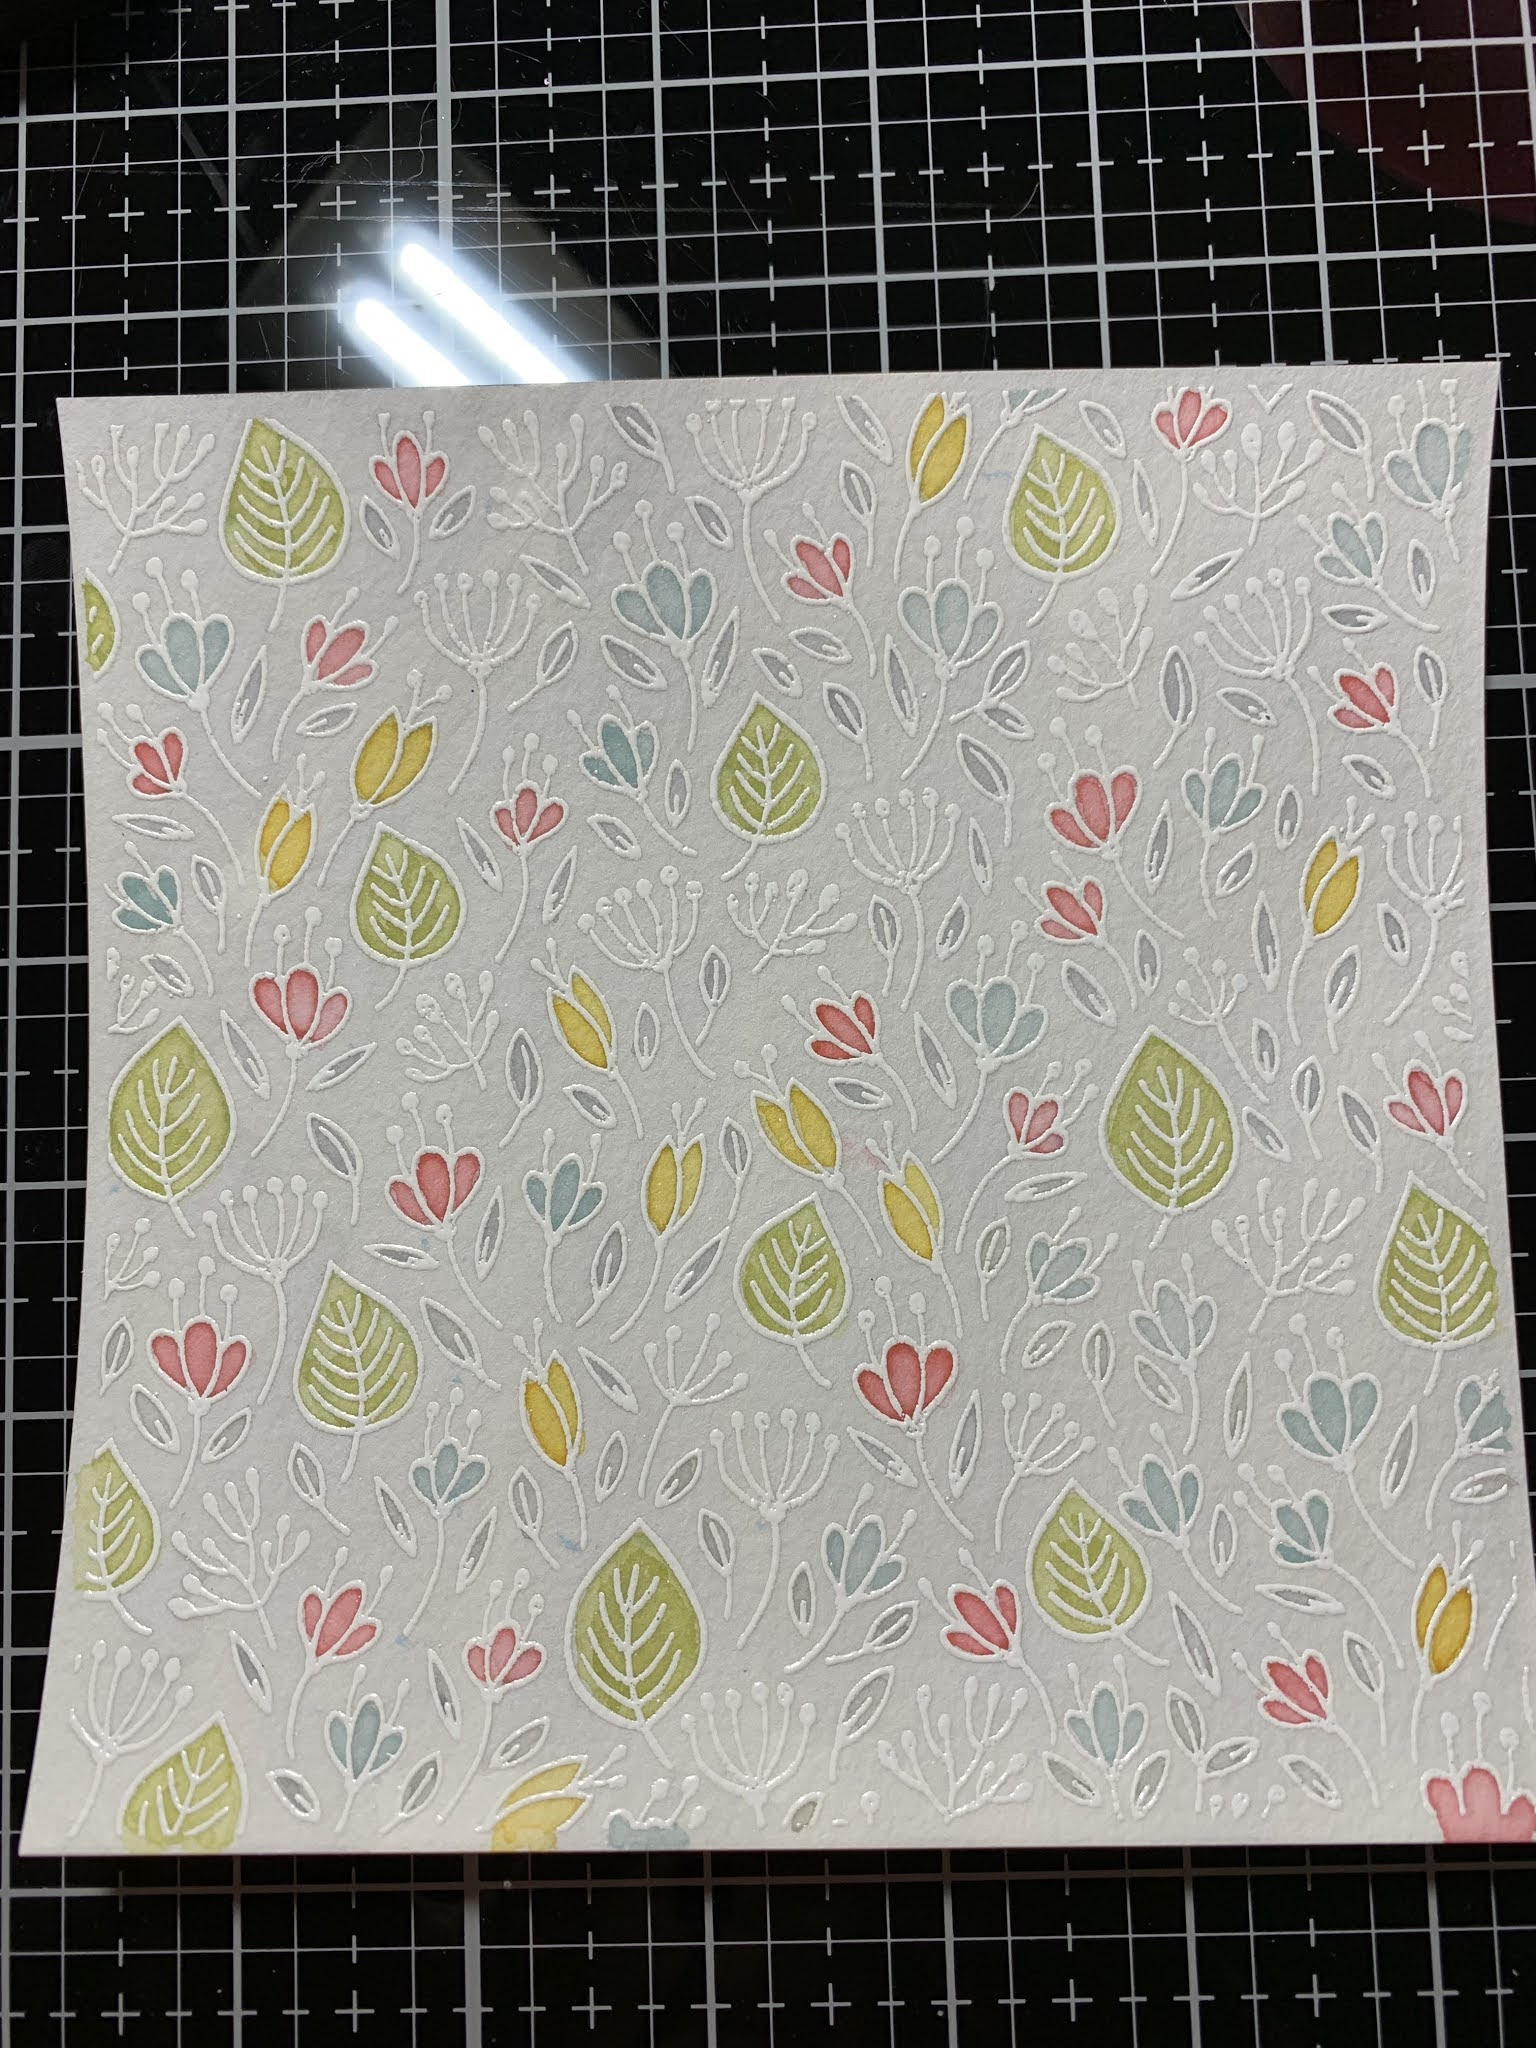
I hope you enjoyed today's card and learned how easy it is to add watercolor to images. If you wanted to step it up a little, you could go back and add more color to the base of the images and blend it out a bit for a faded watercolor look. Water coloring doesn't have to be intimidating, it can be as simple or as elaborate as you want to make it. This is the perfect background stamp for simple water coloring or could even be used to create a tone on tone look, both give beautiful results!


If this is the first time visiting my blog, welcome and I hope you return. If you are a returning visitor, thank you so much for your support!

Should you have any questions or comments please leave them in the comments section. I'd love to hear from you and what you thought about today's card.

If you would like to be notified by email each time I post something new to my blog, you can click on the subscribe button at the top of the page. *Be sure to verify your subscription through the email link to activate. There is also a follow button that you can click on located below my profile if you would like to follow my blog.

Thank you for visiting and I hope you come back soon!

Happy Stamping and God bless!!

Jeannie

Comments

Popular posts from this blog

Shadow Stamping With Stencils

Hello, welcome to my blog!! ***I wanted to let everyone know that Scrapbook.com has kicked off Freebie February!! Every couple of days they will be offering free items along with great sales! Check often as the sales will be frequently changing. I have placed a store logo on the front page of my blog just down below my profile that brings you directly to their store!    *I know die cut machines can be a bigger investment, but if you are in need of one and looking for a good price, Scrapbook.com has some really good prices on Big Shots -  stand alone  machines and bundles.   Today's card project is similar to yesterday's blog post using the shadow stamping technique, but today, I will be using a stencil. I will be using kraft cardstock as well as black cardstock. This is a fun technique to use on any color of cardstock. I wanted to show the look on a light colored cardstock vs a dark color. The key to using any color of cardstock is to first lay down white pigment ink follo

Love & Birthday Wishes - A Little Love Layering Stencils

  Hello, welcome to my blog!!  I want to start out by thanking everyone for the support and nice comments you all leave for me. I truly appreciate the support of this blog!! I enjoy card making and bringing my creations to you, this wouldn't be possible without your support, so again, thank you!! *Affiliate links are used at no additional cost to you. When you purchase products through my links I receive a small commission from these sales, thank you so much for your support, it is greatly appreciated!! For everyone that has been waiting for the A Little Love Layering Stencil Bundle - from Gina K. Designs, it is now back in stock!!! ***This "Love die" is also available for purchase on it's own! Love And Shadow Die Also back in stock are the Blending Brushes !! I used the stencil bundle to create today's card by doing simple blending and adding dimension with stacked die cuts. I love the many color combinations that can be used with this set! I love using gray to

Embossing With Stencils

Hello, welcome to my blog! Today's card project focuses on heat embossing with stencils. Stencils are great for ink blending and are economical. Did you know you can also heat emboss with your stencils? I am showing an example of white heat embossing, but you could also ink blend your stencil then heat emboss with clear embossing powder, if you don't mind getting your embossing pad dirty. Some people have a clean embossing pad dedicated for embossing only, and another embossing pad that they use for different techniques that may get the pad dirty. Let's get started!! To start, I cut a 4 1/4" x 5 1/2" white Neenah cardstock panel using my Tim Holtz Guillotine paper trimmer. I add Gina K. Designs Adhesive Dot Runner  to the corners on the back side of my white card panel to temporarily hold it down onto my Tonic Studios Tim Holtz Glass Media Mat . Next, I prep my panel with my Anti Static powder bag. I then place my Gina K. Designs Water Droplets stencil