Hello, welcome to my blog!!
For today's card I will be making a 5 x 5 square card. I will be water coloring a floral image using Distress Oxide Inks. Water coloring with Oxide Inks give a nice soft, creamy look. I will be doing my water coloring on Bristol Smooth cardstock. This is my go to cardstock for coloring with ink pads and Zig markers. The smooth finish of this cardstock allows the ink to move freely and blend beautifully. Let's get started!!

I will be doing all of my work today on my Tim Holtz Glass Media Mat.
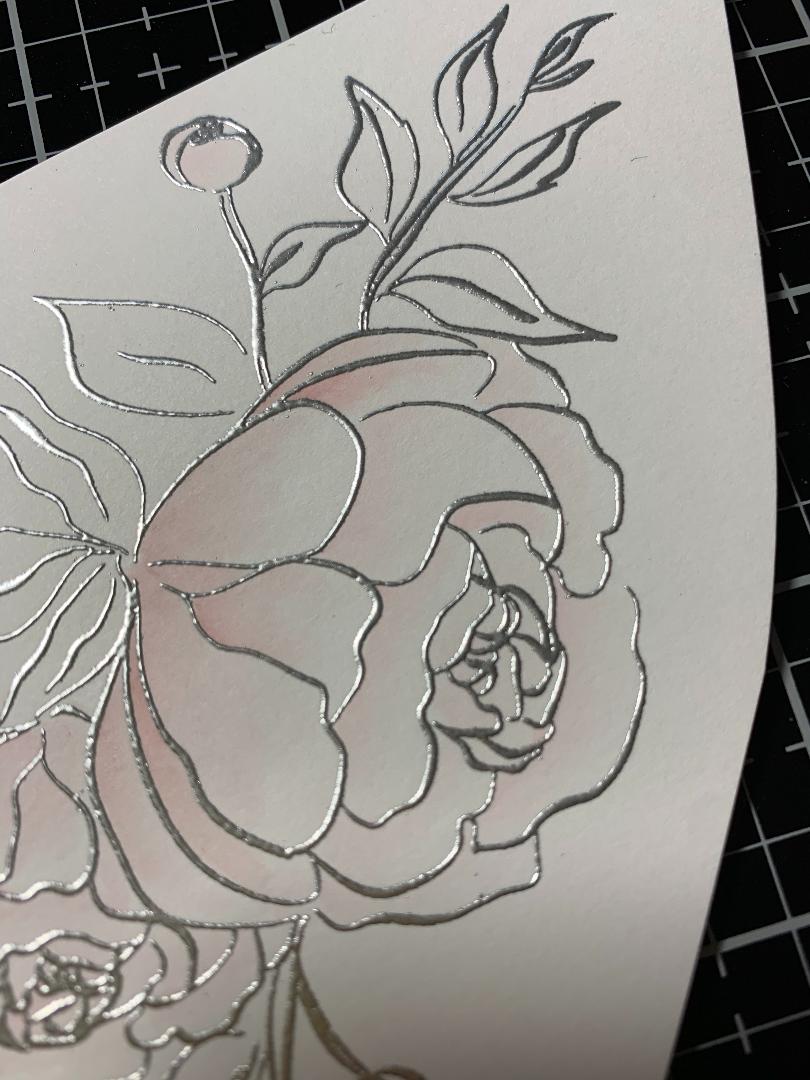
To start, I take a piece of Bristol Smooth Cardstock and place into my MISTI Stamp Poistioner. I prep the cardstock with my Anti Static Powder Bag and stamp an image from the Precious Peony Stamp Set using Versamark Embossing Ink. I then add Detail Silver Embossing Powder and heat set with my Heat Tool.


Next, I press my Spun Sugar Distress Oxide Ink and Victorian Velvet Distress Oxide Ink pads onto the white portion of my Glass Media Mat, this will be my palette. Using my Water Brush filled with clean water, I pick up some of the Spun Sugar Distress Oxide Ink and begin adding color to the base of each petal then pull out the color and fade towards the end of each petal. I will do this for each of the petals as well as the buds to lay down a base color. I'm going for a soft look with my coloring so this color will be very pale.


I now take my Water Brush and pick up my next color, Victorian Velvet Distress Oxide Ink and add to the base of each petal as well as any overlapping petals where there would be some shadow then fade out to blend with the previous color.

Next, I clean off my glass mat and press Bundled Sage Distress Oxide Ink and Weathered Wood Distress Oxide Ink onto the glass mat. With my Water Brush, I pick up Bundled Sage Distress Oxide Ink and add to the base of each leaf, pulling out and fading towards the end of each leaf. I then add a little Weathered Wood Distress Oxide Ink to each leaf to add a little contrast.


Using my Razor Edge Shears, I fussy cut my image.

I now take the biggest die from the Outside In Stitched Square Die Set and cut out of Neenah White Cardstock, running them through my Big Shot Die Cut Machine. I take my square panel and use my Blender Brush to lightly blend Bundled Sage Distress Oxide Ink onto the top right portion of the panel, this is where I will be stamping a sentiment. I then take a small paintbrush with clean water and splatter over the blended ink then place a paper towel over the top to pick up the water drops. I do this to break up the color a little bit.


I now place my square panel into my MISTI Stamp Positioner and choose a sentiment from the Special Thoughts Stamp Set. I stamp the sentiment over the blended ink using Versafine Clair Nocturn Ink.


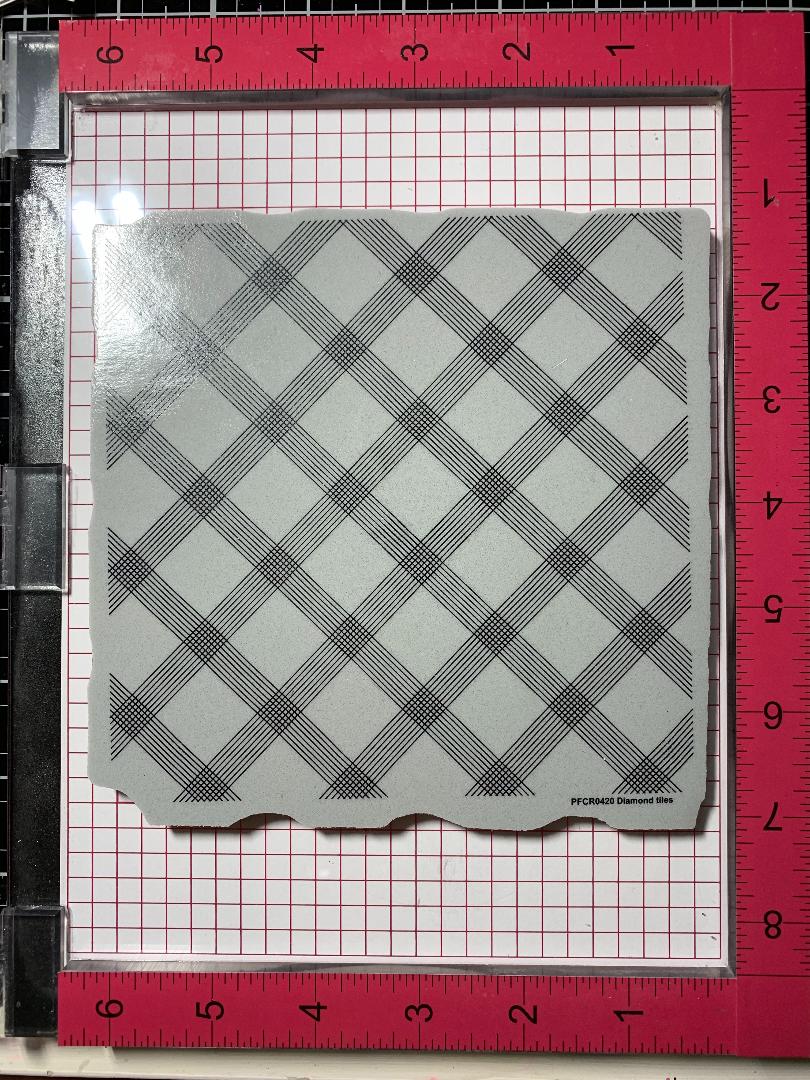
Next, I take a 5" x 5" pink card base from my stash and place into my MISIT Stamp Positioner and prep with my Anti Static Powder Bag. Taking my Diamond Tiles Background Stamp, I stamp the card base with Spun Sugar Distress Oxide Ink. I then add Detail White Embossing Powder and heat set with my Heat Tool. *Using the Oxide ink to emboss with seemed to give a lighter coverage of embossing which I found interesting. Maybe because the Oxide ink is a bit dryer than embossing ink?


To mount my square panel I add Double Sided Adhesive Foam to the back, remove the release paper then adhere it onto my embossed pink card base.


To add a little more fullness to my floral image, I take my Leafy Branch Die and cut it out of Vellum two times running them through my Big Shot Die Cut Machine. I cut the die cuts in half the glue behind my floral image using Liquid Glue.


Finally, I add Foam Tape to the back of the floral image and mount onto my card. I add a few Water Droplets using Liquid Glue and this completes my card.


I hope you enjoyed today's card project. I have really enjoyed creating different sized cards lately, it lets me use my stamps in different arrangements. I really love the soft look the Oxide Inks give to flowers. This particular color combo is a favorite of mine when coloring peonies.
If this is the first time visiting my blog, welcome and I hope you return. If you are a returning visitor, thank you so much for your support!
Should you have any questions or comments please leave them in the comments section. I'd love to hear from you and what you thought about today's card.
If you would like to be notified by email each time I post something new to my blog, you can click on the subscribe button at the top of the page. There is also a follow button that you can click on located below my profile if you would like to follow my blog.
Thank you for visiting and I hope you come back soon!
Happy Stamping and God Bless!!
Jeannie
Comments
Post a Comment