Hello, welcome to my blog!!
I want to start out by thanking everyone for the support and nice comments you all leave for me. I truly appreciate the support of this blog!! I enjoy card making and bringing my creations to you, this wouldn't be possible without your support, so again, thank you!!!
Today I will be creating a card using inks, cardstock and products from Gina K. Designs. I will be using the Natural Silhouettes Stamp Set which is now back in stock! This is a beautiful silhouette stamp set filled with trees, flowers, birds and three greetings. This is a versatile stamp set that can be used to create cards for all occasions. I chose to use a word die for my greeting and coordinated it with the colors of my card to create a monochromatic look. Let's get started!!

I will be doing all of my work today on my Tim Holtz Glass Media Mat.
To begin, I cut a 4 1/4" x 5 1/2" panel out of White Cardstock using my Tim Holtz Guillotine Paper Trimmer. I then take my Blender Brushes and blend Plum Punch Ink around the center of my panel fading out at the very center. I also fade out around the outer edges a bit. Next, I blend Edible Eggplant Ink around the previous color, blending back into it a bit. I then blend Black Onyx Ink around the sides and corners. With the remaining ink on the brush, I lightly blend Plum Punch Ink over the very center, keeping it light. *I could have skipped the black ink blend as my die didn't reach out that far.


Next, I stamp an image from the Natural Silhouettes Stamp Set with Amalgam Obsidian Ink using my MISTI Stamp Positioner. I end up stamping the image twice to get a dark, crisp image.

Taking the biggest die from the Double Stitched Ovals Die Set, I adhere it over my stamped image using Purple Tape then run through my Big Shot Die Cut Machine.

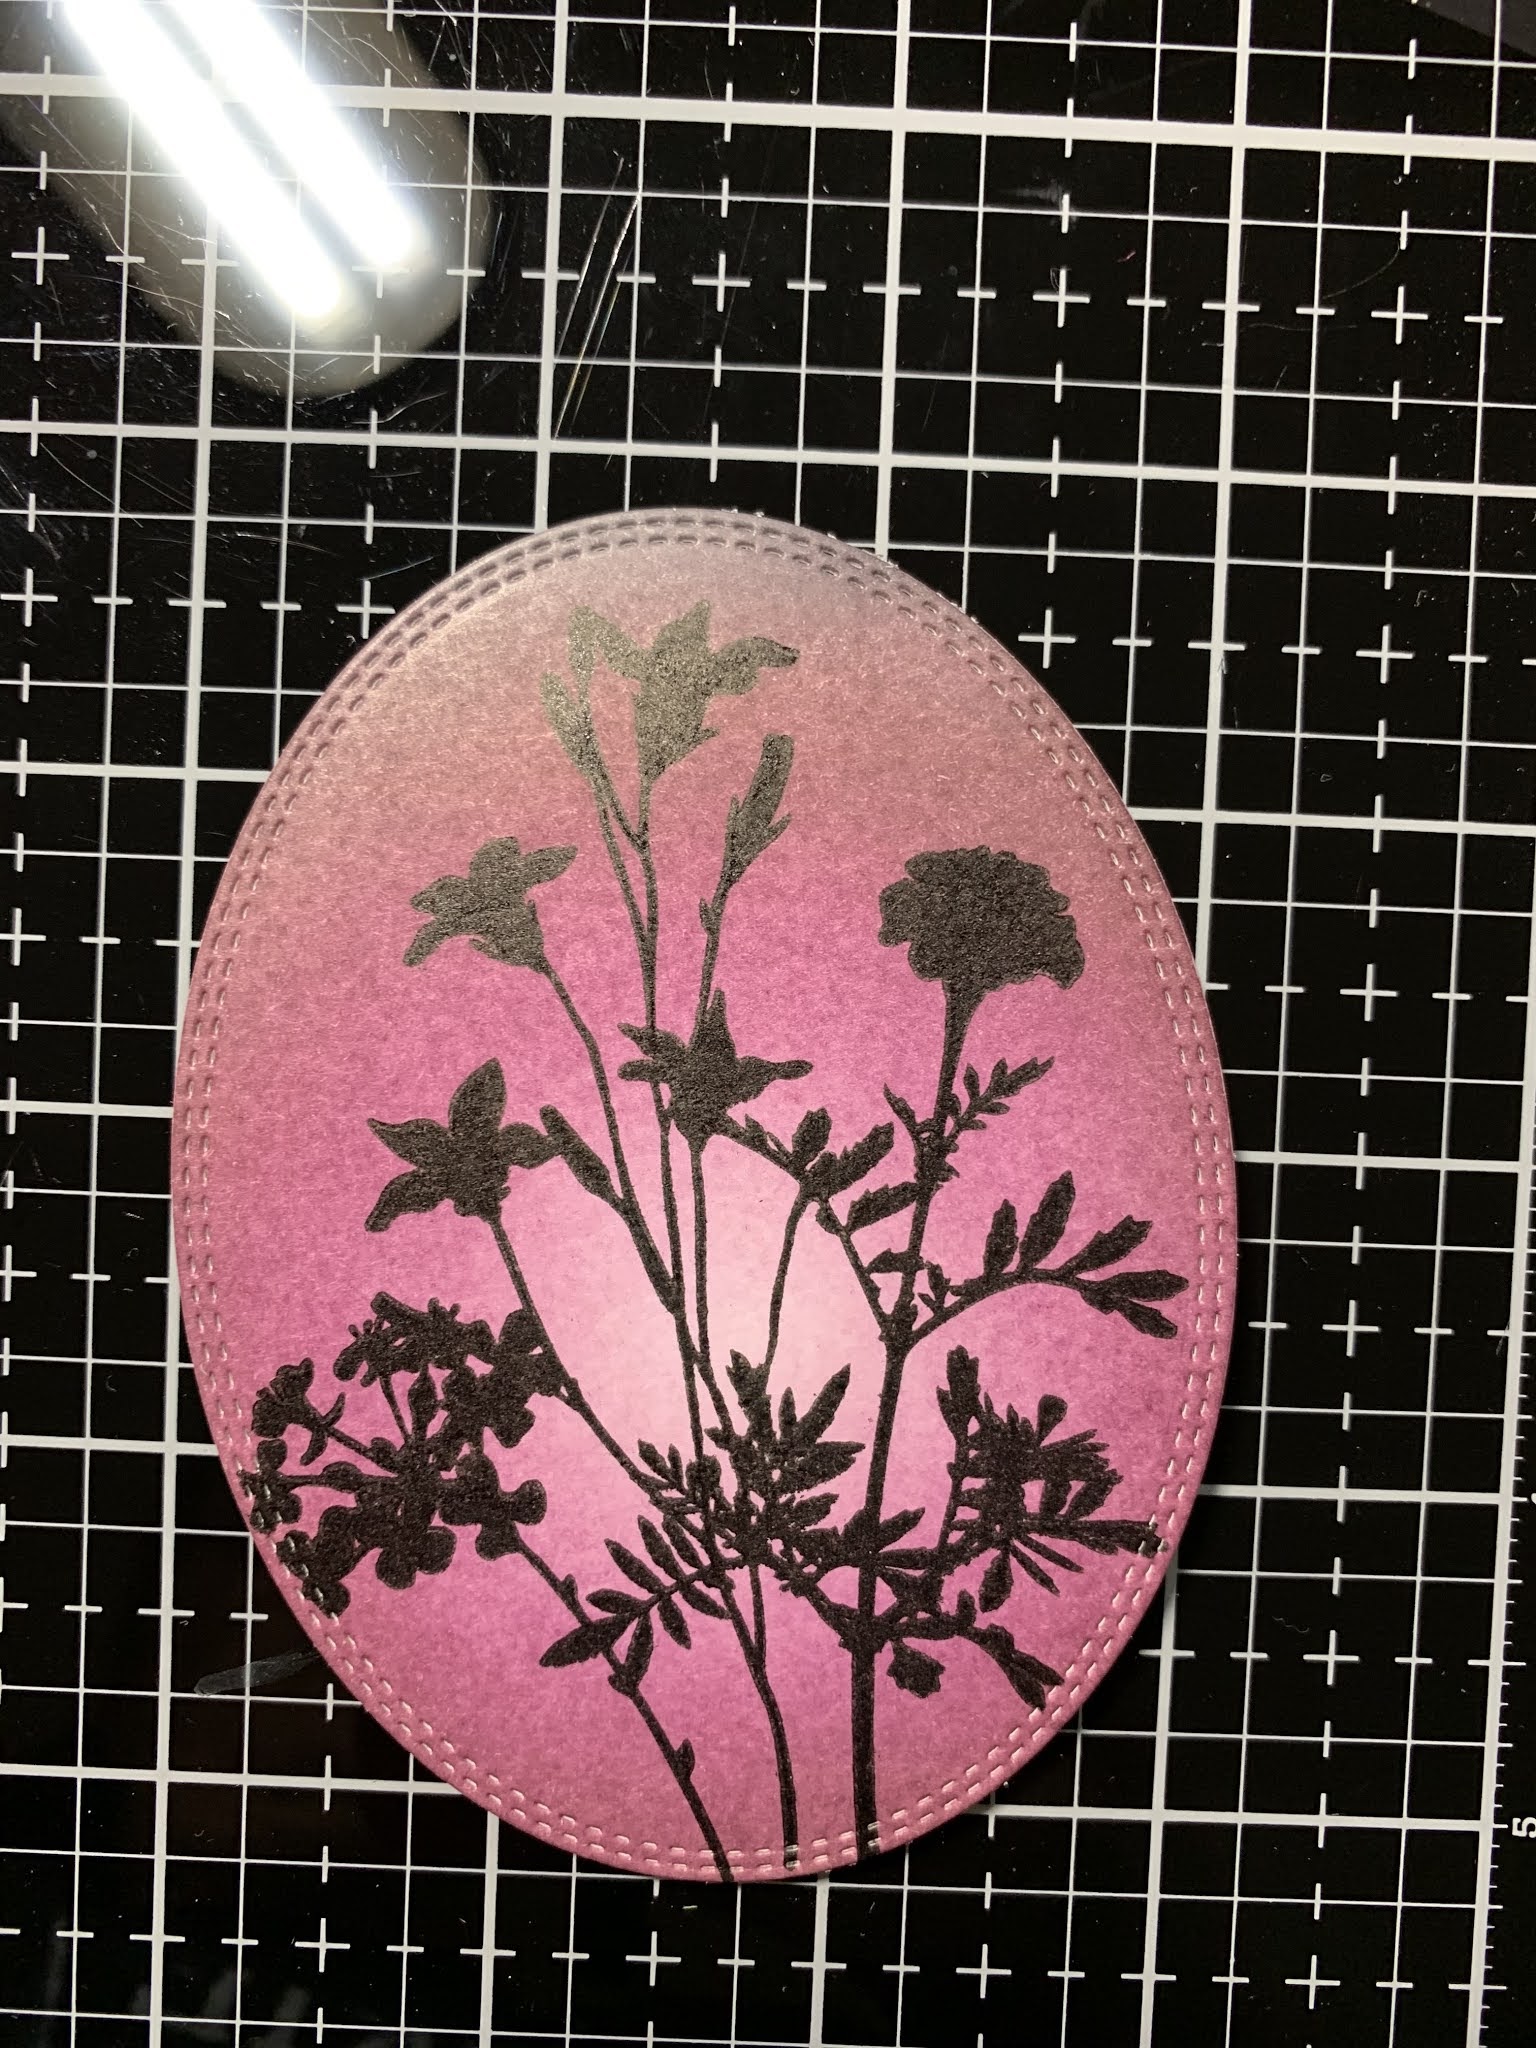
To add some depth, I use my Blender Brush to lightly blend Black Onyx Ink around the very edges of my oval die cut. Because I am going with a monochromatic look, the black ink helps to frame the image and allows it to show up better over the finished background.

I now take a 4 1/4" x 5 1/2" panel of Plum Punch Cardstock and adhere it to my Ornamental Fans Stencil using Purple Tape. I then run them through my Big Shot normally as I would if I were using a die. *Doing this step defines the images, popping them up just a bit. It isn't necessary but I like the look it gives. Using my Blender Brush I very lightly blend Edible Eggplant Ink over the entire panel. I then blend Black Onyx Ink to the base of each fan on the stencil. **When dry embossing a stencil, use a very low take tape as the embossing machine will press the tape into the cardstock a bit. Do NOT use pixie spray to adhere your stencil when dry embossing as the front of your cardstock will tear or leave adhesive behind when removing the stencil.


Here is a close up of the dry embossed look after removing the stencil.

After my stenciling is complete, I take the biggest stitched die from the Master Layouts 2 Die Set and adhere over my panel using Purple Tape. I also take the layering die from the Master Layouts 2 Die Set and cut out of Black Onyx Cardstock, running them both through my Big Shot. Using Terrific Tape, I adhere the two panels together.


Placing a 5 1/2" x 8 1/2" piece of Edible Eggplant Cardstock into my Scor Buddy, I score at 4 1/4" creating a side folding card base. I then use Terrific Tape and adhere my panels onto the card base.


To add a little dimension to my card, I add Foam Tape to the back of my image then mount it onto my card front.

Next, I take the Thankful Die and cut out of Plum Punch Cardstock and Edible Eggplant Cardstock, running them through my Big Shot. Using Liquid Glue I adhere the two die cuts together, offsetting them to create a shadow effect. To give my die cuts stability and dimension I end up cutting three additional die cuts then stack and glue them to the back of my greeting.


I add Liquid Glue to the back of the "thank" part of the die cut then cut a couple of sliver pieces of Foam Tape and add to the back of the "ful" part of the die cut that will be hanging off of the oval. I use my Jewel Picker to add some Water Droplets with Liquid Glue and this completes my card.

I really like the look of the plum and eggplant colors together and with fall here, I am drawn more to the deeper colors. Instead of starting with a white panel for the image, you could also use the plum cardstock and blend just the eggplant ink and fade out towards the center to get a similar look. I used white cardstock as I wanted a more dramatic highlighted center. I think this card would also look great in teal colors!
If this is the first time visiting my blog, welcome and I hope you return. If you are a returning visitor, thank you so much for your support!
Should you have any questions or comments please leave them in the comments section. I'd love to hear from you and what you thought about today's card.
If you would like to be notified by email each time I post something new to my blog, you can click on the subscribe button at the top of the page. *Be sure to verify your subscription through the email link to activate. There is also a follow button that you can click on located below my profile if you would like to follow my blog.
Thank you for visiting and I hope you come back soon!
Happy Stamping and God bless!!
Jeannie
Beautiful
ReplyDeleteThank you so much!!
DeleteThat’s so pretty, love the colors.
ReplyDeleteThank you Robin!!
Delete