Hello, welcome to my blog!!
***I wanted to let everyone know that Scrapbook.com has kicked off Freebie February!! Every couple of days they will be offering free items along with great sales! Check often as the sales will be frequently changing. I have placed a store logo on the front page of my blog just down below my profile that brings you directly to their store!
*I know die cut machines can be a bigger investment, but if you are in need of one and looking for a good price, Scrapbook.com has some really good prices on Big Shots - stand alone machines and bundles.
Today's card project focuses on water coloring with Ken Oliver Colorbursts. Colorbursts are highly pigmented powders that when mixed with water can be used to watercolor. They can be mixed with water in a pallet, or like I do, you can put the powder in small wells, add a little water and let dry to create pans that you can dab with water brushes or paintbrushes to apply to your projects. You only need to add a very small amount of Colorbursts to your project and let your water brush do the work! Today, I will be creating a slimline card to change things up. Let's get started!!

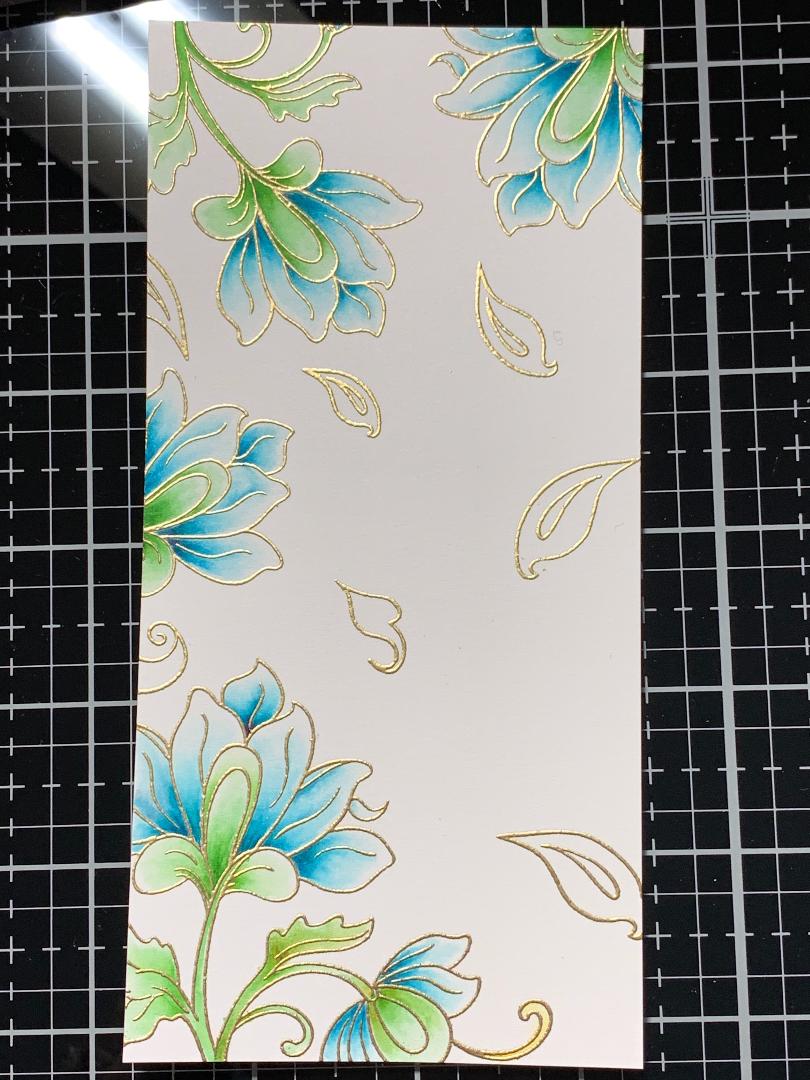
I start with cutting a 3 1/8" x 6 3/8" panel out of Bristol Smooth cardstock using my Tim Holtz Guillotine paper trimmer. Next, I prep my panel with my Anti Static powder bag. I place my panel in my MISTI stamp positioner and stamp some flowers from my Persian Motifs stamp set using Versamark ink. I next add Gold embossing power and heat set with my Heat Tool.

Now for the fun part! Taking my Water Brush, I work on one petal at a time and add a small amount of Turquoise Colorburst from the Caribbean Collection, then wipe the remaining ink off on a paper towel. Using the same water brush, and making sure it is damp and not too wet, I dab at the ink and pull it out toward the end of the petal so that the color fades out. I work every other petal so that the color has a chance to dry before moving the the neighboring petals. I repeat this process for all of the flowers. ***I keep my water brush damp, not wet for this process. If the brush becomes dry, I squeeze the barrel of the water brush to release more water, then dab it onto a paper towel so that the bristles stay damp and not too wet.


I now color the stems and leaves with Sap Green Colorburst from the Fresh Florals Collection using the same process as I did with the flowers. I then go back and add Olive Green Colorburst from the Moroccan Collection.

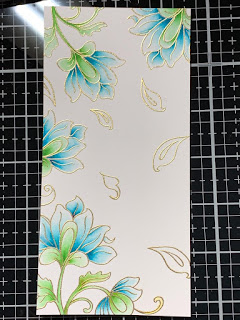

I finish by painting the falling petals with Turquoise.


I wanted to add some spatters to my panel but also wanted texture. I prepped the entire panel with my anti static powder bag, then took a small paintbrush with clean water and spattered the panel. Quickly, before the water spatters dried I added gold embossing powder, tapped off the excess powder then heat set. This was my first time trying this technique, and I really love the results!! This technique gives fine as well as chunky embossed spatters.
I mount my embossed panel onto a 3 1/4" x 6 1/2" piece of black cardstock, then onto a 3 3/4" x 7" Tranquil Teal card base.


I choose a sentiment from the same Persian Motifs stamp set, prep a piece of black cardstock with my anti static powder bag and stamp the sentiment using Versamark ink. I add gold embossing powder and heat set. I cut out my sentiment using my Sentiment Banners die, and Big Shot die cut machine. To add some interest behind my sentiment, I use the Leafy Branch die and cut out of Vellum.
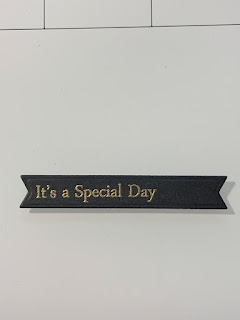

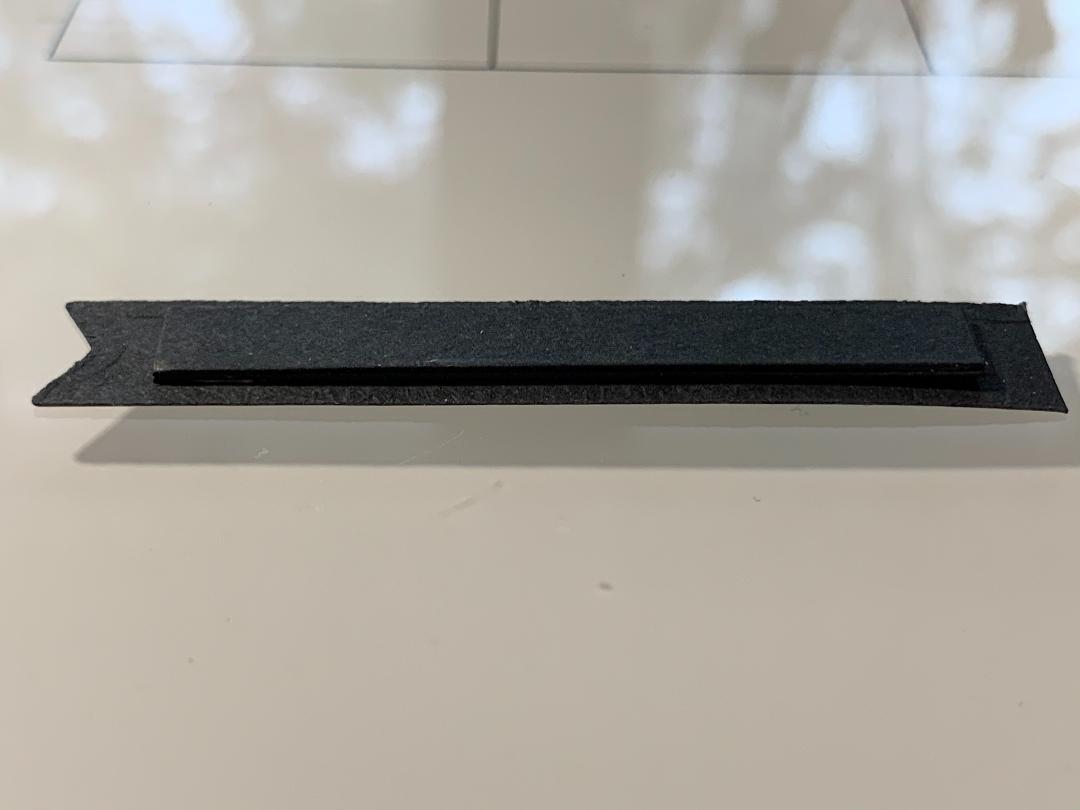
I want to add some dimension to my sentiment, but not too much. Instead of using foam tape, I cut two scrap pieces of black cardstock, then stack and glue together, glue onto the backside of my sentiment.


Now I add Liquid Glue onto the back of my vellum leafy branch where it will be hidden behind my sentiment. I trim off the right edge of the branch and place it on the front of my card. I then trim the right edge of my sentiment and glue it over the vellum die cut. To finish off my card, I add Water Droplets using liquid glue and this completes my card.

This was my first time making a slim card, I see them all over social media and I have to say, I do like them!! Water coloring with Colorbursts is a quick and fun way to add color to your images. I hope you found today's card fun and interesting and come back tomorrow for another card project!
If this is the first time visiting my blog, welcome and I hope you return. If you are a returning visitor, thank you so much for your support!
Should you have any questions or comments please leave them in the comments section. I'd love to hear from you and what you thought about today's card.
If you would like to be notified by email each time I post something new to my blog, you can click on the subscribe button at the top of the page.
Thank you for visiting and I hope you come back soon!
Happy Stamping!!
Jeannie
***I wanted to let everyone know that Scrapbook.com has kicked off Freebie February!! Every couple of days they will be offering free items along with great sales! Check often as the sales will be frequently changing. I have placed a store logo on the front page of my blog just down below my profile that brings you directly to their store!
*I know die cut machines can be a bigger investment, but if you are in need of one and looking for a good price, Scrapbook.com has some really good prices on Big Shots - stand alone machines and bundles.
Today's card project focuses on water coloring with Ken Oliver Colorbursts. Colorbursts are highly pigmented powders that when mixed with water can be used to watercolor. They can be mixed with water in a pallet, or like I do, you can put the powder in small wells, add a little water and let dry to create pans that you can dab with water brushes or paintbrushes to apply to your projects. You only need to add a very small amount of Colorbursts to your project and let your water brush do the work! Today, I will be creating a slimline card to change things up. Let's get started!!

I start with cutting a 3 1/8" x 6 3/8" panel out of Bristol Smooth cardstock using my Tim Holtz Guillotine paper trimmer. Next, I prep my panel with my Anti Static powder bag. I place my panel in my MISTI stamp positioner and stamp some flowers from my Persian Motifs stamp set using Versamark ink. I next add Gold embossing power and heat set with my Heat Tool.

Now for the fun part! Taking my Water Brush, I work on one petal at a time and add a small amount of Turquoise Colorburst from the Caribbean Collection, then wipe the remaining ink off on a paper towel. Using the same water brush, and making sure it is damp and not too wet, I dab at the ink and pull it out toward the end of the petal so that the color fades out. I work every other petal so that the color has a chance to dry before moving the the neighboring petals. I repeat this process for all of the flowers. ***I keep my water brush damp, not wet for this process. If the brush becomes dry, I squeeze the barrel of the water brush to release more water, then dab it onto a paper towel so that the bristles stay damp and not too wet.


I now color the stems and leaves with Sap Green Colorburst from the Fresh Florals Collection using the same process as I did with the flowers. I then go back and add Olive Green Colorburst from the Moroccan Collection.


I finish by painting the falling petals with Turquoise.


I wanted to add some spatters to my panel but also wanted texture. I prepped the entire panel with my anti static powder bag, then took a small paintbrush with clean water and spattered the panel. Quickly, before the water spatters dried I added gold embossing powder, tapped off the excess powder then heat set. This was my first time trying this technique, and I really love the results!! This technique gives fine as well as chunky embossed spatters.
I mount my embossed panel onto a 3 1/4" x 6 1/2" piece of black cardstock, then onto a 3 3/4" x 7" Tranquil Teal card base.


I choose a sentiment from the same Persian Motifs stamp set, prep a piece of black cardstock with my anti static powder bag and stamp the sentiment using Versamark ink. I add gold embossing powder and heat set. I cut out my sentiment using my Sentiment Banners die, and Big Shot die cut machine. To add some interest behind my sentiment, I use the Leafy Branch die and cut out of Vellum.


I want to add some dimension to my sentiment, but not too much. Instead of using foam tape, I cut two scrap pieces of black cardstock, then stack and glue together, glue onto the backside of my sentiment.

Now I add Liquid Glue onto the back of my vellum leafy branch where it will be hidden behind my sentiment. I trim off the right edge of the branch and place it on the front of my card. I then trim the right edge of my sentiment and glue it over the vellum die cut. To finish off my card, I add Water Droplets using liquid glue and this completes my card.

This was my first time making a slim card, I see them all over social media and I have to say, I do like them!! Water coloring with Colorbursts is a quick and fun way to add color to your images. I hope you found today's card fun and interesting and come back tomorrow for another card project!
If this is the first time visiting my blog, welcome and I hope you return. If you are a returning visitor, thank you so much for your support!
Should you have any questions or comments please leave them in the comments section. I'd love to hear from you and what you thought about today's card.
If you would like to be notified by email each time I post something new to my blog, you can click on the subscribe button at the top of the page.
Thank you for visiting and I hope you come back soon!
Happy Stamping!!
Jeannie
Absolutely stunning. Love the colors. Have the color burst set.... guess that means get cracking'! Thanks for the inspiration....
ReplyDeleteThank you!!
DeleteWhat a lovely card, thank you so much for sharing how you created it. I haven't tried the Colorbursts yet, but will be checking them out.
ReplyDeleteThank you Jo!! Have fun with the Colorbursts. If you have any questions, please reach out. :)
Delete