Hello, welcome to my blog!
As we say goodbye to 2019 and hello to 2020, I thought I'd share a couple of fun New Years cards with you. For both cards I use glitter cardstock to bring a bright, sparkly, festive look.
Let's get started!

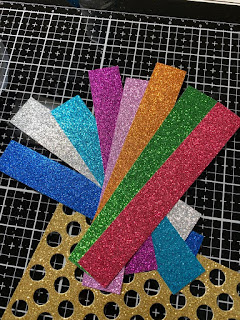
For my first card, I take a 4 3/16" x 5 7/16" piece of gold Simon Says Stamp Assorted Glitter Cardstock and My Favorite Things Peek-A-Boo Polka Dots Die-namics and run them through my Big Shot die cut machine. I then take strips of assorted colors from the same glitter cardstock and die cut them with the same die so that I have an assortment of colored dots.


Next, I use Gina K. Designs Connect Liquid Glue and apply glue to the back of my gold panel, and mount it onto a 4 1/4" x 5 1/2" Taylored Expressions Oreo card base. ***After attaching the gold panel to the card base, I trimmed any extra black cardstock at the top and side opening from the card base. Using my liquid glue, I add small amounts to some of the black openings. With my Jewel Picker, I pick up the colored dots one at a time and set them over the glued areas, lightly pressing them into place. I continue with this process until my panel is complete. I also used some of the same colored dots as the gold panel from my original cut to create more gold area.


Now, I work on my greeting. Using My Favorite Things Little Letters Die-Namics, I cut out "Happy New Years" three times. I then take my liquid glue and stack each letter together to create dimension. Next, I use my T-Square Ruler to make sure my words are straight and glue them into place. After all letters are glued into place, I like to set a large acrylic block on top for a couple of minutes to hold them into place while the glue dries.


My card could be done at this point, but I thought I would add some Tonic Nuvo Aqua Shimmer to each letter for a bit of sparkle. I then decided to add Ranger Glossy Accents to the letters to give a them shiny look then set aside to dry for a couple of hours. This completes my first card.


For my second card, I used Taylored Expressions Oreo cardstock and the Taylored Expressions Diagonal Stripes Cover Plate and ran them through my Big Shot die cut machine, I then removed each diagonal and saved them for another project. Using my Connect liquid glue, I attached the frame to a 4 1/4" x 5 1/2" Oreo card base.


Next, I decided to use gold and silver glitter cardstock (the same glitter c/s from the first card) and cut out the diagonals alternating between colors. You can either cut each diagonal out one at a time or cut the complete panel out of gold and silver, that way you would have extra pieces and frames for additional cards. I now use my liquid glue and inlay each diagonal of gold and silver glitter cardstock into the frame.


To complete this card, I use the same alphabet dies from the first card this time using one layer for each letter. I then add black jewels from Lucys Cards and this finishes up my second and final card.

I hope you enjoyed today's cards and give glitter cardstock a try if you haven't already. Pictures do not capture the beauty and sparkle these cards give. I appreciate you stopping by my blog, and hope you stop back again soon!
If you have any questions, comments or ideas for future projects, please leave them in the comments section. If you would like to know of future projects, you can subscribe (at the top) to this blog and be notified by email each time a new project is posted.
I wish you all a happy, healthy and blessed 2020!!!
Happy Stamping!!
Jeannie
As we say goodbye to 2019 and hello to 2020, I thought I'd share a couple of fun New Years cards with you. For both cards I use glitter cardstock to bring a bright, sparkly, festive look.
Let's get started!

For my first card, I take a 4 3/16" x 5 7/16" piece of gold Simon Says Stamp Assorted Glitter Cardstock and My Favorite Things Peek-A-Boo Polka Dots Die-namics and run them through my Big Shot die cut machine. I then take strips of assorted colors from the same glitter cardstock and die cut them with the same die so that I have an assortment of colored dots.


Next, I use Gina K. Designs Connect Liquid Glue and apply glue to the back of my gold panel, and mount it onto a 4 1/4" x 5 1/2" Taylored Expressions Oreo card base. ***After attaching the gold panel to the card base, I trimmed any extra black cardstock at the top and side opening from the card base. Using my liquid glue, I add small amounts to some of the black openings. With my Jewel Picker, I pick up the colored dots one at a time and set them over the glued areas, lightly pressing them into place. I continue with this process until my panel is complete. I also used some of the same colored dots as the gold panel from my original cut to create more gold area.


Now, I work on my greeting. Using My Favorite Things Little Letters Die-Namics, I cut out "Happy New Years" three times. I then take my liquid glue and stack each letter together to create dimension. Next, I use my T-Square Ruler to make sure my words are straight and glue them into place. After all letters are glued into place, I like to set a large acrylic block on top for a couple of minutes to hold them into place while the glue dries.


My card could be done at this point, but I thought I would add some Tonic Nuvo Aqua Shimmer to each letter for a bit of sparkle. I then decided to add Ranger Glossy Accents to the letters to give a them shiny look then set aside to dry for a couple of hours. This completes my first card.


For my second card, I used Taylored Expressions Oreo cardstock and the Taylored Expressions Diagonal Stripes Cover Plate and ran them through my Big Shot die cut machine, I then removed each diagonal and saved them for another project. Using my Connect liquid glue, I attached the frame to a 4 1/4" x 5 1/2" Oreo card base.


Next, I decided to use gold and silver glitter cardstock (the same glitter c/s from the first card) and cut out the diagonals alternating between colors. You can either cut each diagonal out one at a time or cut the complete panel out of gold and silver, that way you would have extra pieces and frames for additional cards. I now use my liquid glue and inlay each diagonal of gold and silver glitter cardstock into the frame.


To complete this card, I use the same alphabet dies from the first card this time using one layer for each letter. I then add black jewels from Lucys Cards and this finishes up my second and final card.

I hope you enjoyed today's cards and give glitter cardstock a try if you haven't already. Pictures do not capture the beauty and sparkle these cards give. I appreciate you stopping by my blog, and hope you stop back again soon!
If you have any questions, comments or ideas for future projects, please leave them in the comments section. If you would like to know of future projects, you can subscribe (at the top) to this blog and be notified by email each time a new project is posted.
I wish you all a happy, healthy and blessed 2020!!!
Happy Stamping!!
Jeannie
Comments
Post a Comment