Hello, welcome to my blog!!
I want to start out by thanking everyone for the support and nice comments you all leave for me. I truly appreciate the support of this blog!! I enjoy card making and bringing my creations to you, this wouldn't be possible without your support, so again, thank you!!
I hope everyone had a great weekend and the new week is off to a great start! Today I have a card using the brand new Master Layouts 4 die set from Gina K. Designs. I will also be using the Beautiful Wings stamp set and a die from A Little Love Layering Stencil Set which are both out of stock right now but should be restocked in the next couple of weeks. If you'd like to be notified when these items are restocked, you can click on the "notify me" button in the product description on Gina's website. Gina really hit it out of the park with her Master Layouts die sets! These are phenomenal layering die sets. No more uneven cut panels, with these dies you get a perfect cut every time! There are rectangles and squares, some with stitching, even ovals and circles for greetings, all with perfect layering dies. There are also banner dies for sentiments! I am really loving the newest Master Layouts 4 set featuring a large stitched scallop rectangle, stitched heart with layering die, some cute buttons, a postage stamp, banner dies and a wide stitched flag with layering die. I will be using the layering die for the wide flag on today's card a well as the large stitched scallop rectangle. Let's get started!!

I will be doing all of my work today on my Tim Holtz Glass Media Mat.
Before we get started, I wanted to let everyone know that Gina's full set of new Blender Brushes are back in stock!! I have been using these brushes for a while now and I am really loving them! These brushes are so soft and blend ink effortlessly! I have the ten brush set which comes with a super sturdy brush holder that holds all ten brushes and is one solid piece that can easily be transported if needed. There are also colored clips that can be added to each brush so you know which brush to use with its coordinating ink. Gina will be offering an additional insert for this brush holder that can hold two more brushes, as well as other craft tools that will sit higher up in the center open area of this holder. This insert should be available early this year!

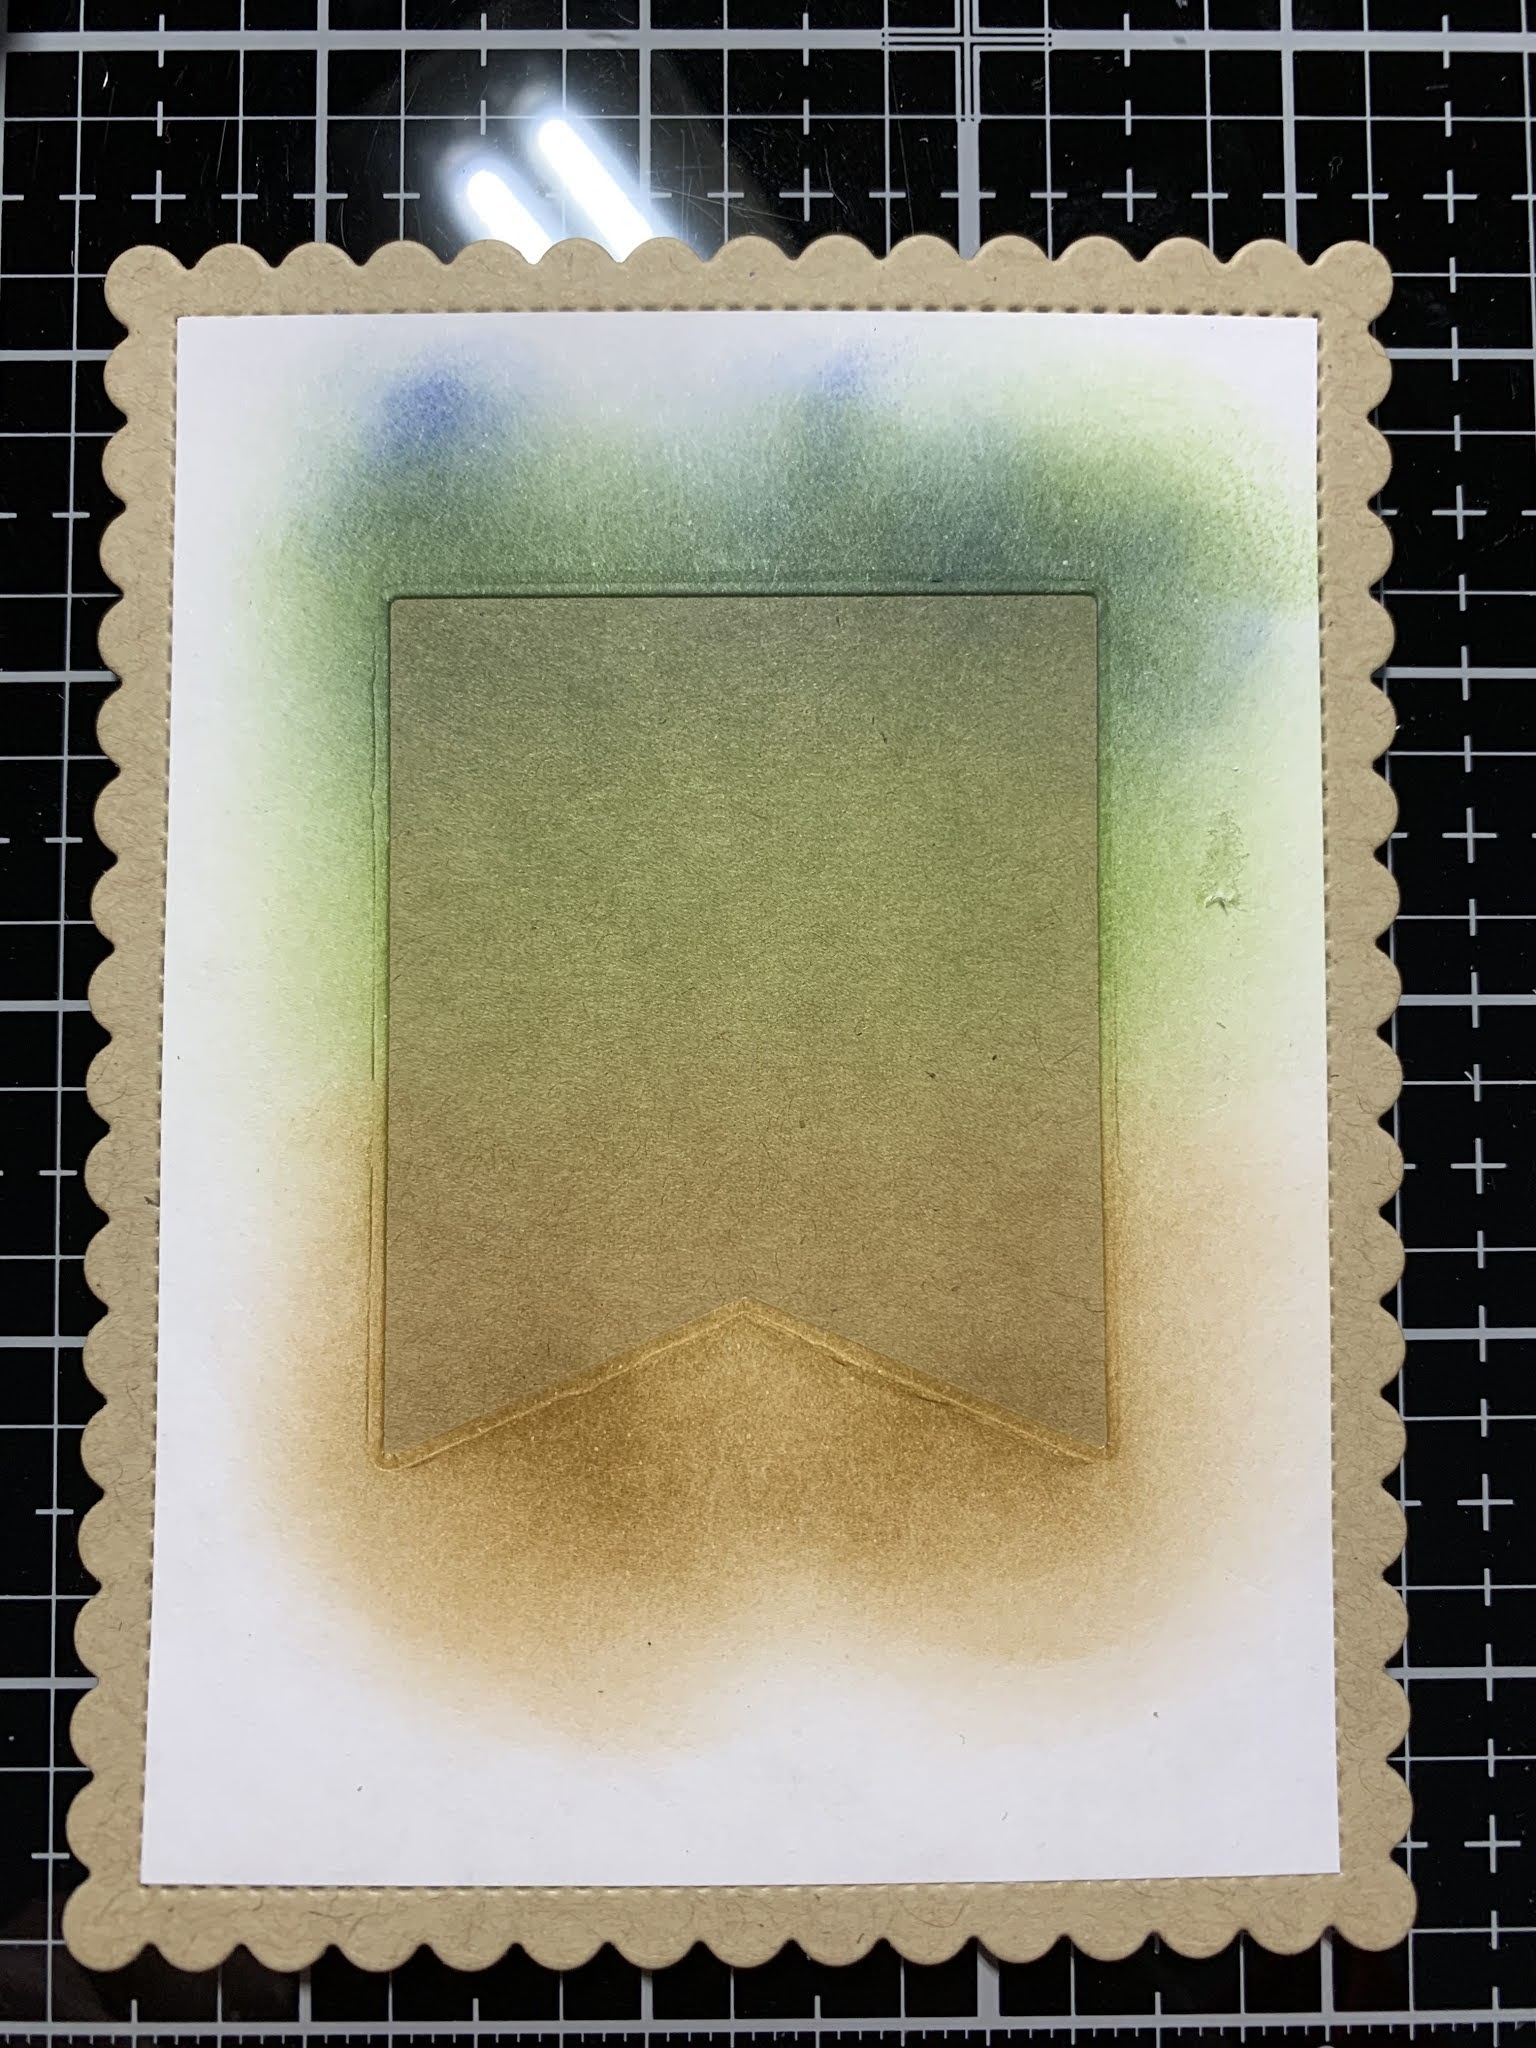
For my card, I start by using the scallop die from the Master Layouts 4 Die Set to cut out of Kraft Cardstock, running them through my Big Shot Die Cut Machine. Next, I cut a 3 3/8" x 4 1/2" piece of Masking Magic Paper using my Tim Holtz Guillotine Paper Trimmer. I then take the wide flag die from the Master Layouts 4 Die Set and place it over my masking paper just above center and hold in place using Purple Tape then run it through my Big Shot.


Removing the release paper I adhere the Masking Magic Paper onto my panel, just inside the stitched area. I then rub my hand over the panel making sure it's adhered into place. Using my Blending Brush I blend Warm Cocoa Ink over the bottom portion of the open flag area. Next, I blend Fresh Asparagus Ink over the center area and blend back just a bit into the previous color. To add just a little depth I blend Blue Denim Ink over the very top of the flag edge.


I now remove the Masking Magic Paper and place the panel into my MISTI Stamp Positioner. Taking an image from the Beautiful Wings Stamp Set I stamp it over the ink blended area using Amalgam Obsidian Black Ink.


I take another image from the Beautiful Wings Stamp Set and stamp it just above my previous stamped image and stamp it using Amalgam Obsidian Black Ink.


I now take the love script die from the Love And Shadow Die Set (This die is also included in the bundle that I have listed in the next step, below) and cut once out of Dark Sage Cardstock and Black Onyx Cardstock, running them through my Big Shot. I use my Craft Pick to remove the pieces then use Liquid Glue the two die cuts together, offsetting just a bit. This helps build a little dimension to the die cut as well as giving it a thin shadow, helping it to stand out against the background. *When die cutting intricated dies, I place a Metal Adapter Plate under the bottom cutting plate of my die cut machine.


Next, I place my stamped panel back into my MISTI and temporarily lay the stacked die cut onto the panel to figure out my sentiment placement. Taking a sentiment from A Little Love Layering Stencil Bundle I line it up under the die cut and stamp it using Amalgam Obsidian Black Ink.


To create a card base, I place a 5 1/2" x 8 1/2" piece of Fresh Asparagus Cardstock into my Scor Buddy and score it at 4 1/4" creating a side folding card base. Using Foam Tape, I adhere my panel onto the card base. I then adhere my die cut greeting just above the stamped sentiment using Liquid Glue.


To finish, I use my Jewel Picker to add a few Dew Drops to the front with Liquid Glue and this completes my card.

I hope you enjoyed today's card. I just love these Master Layouts die sets, they are so versatile and can be used to create many different styles of cards! Gina has lots of great videos showing different ideas using her Master Layouts die sets. Just head over to Gina K. Designs YouTube Channel to check them out. I created a card today that could be sent as a sympathy card or maybe given to someone who is going through a tough time to let them know that they are in your prayers. There are many great sentiments that coordinate with the love die included in A Little Love Layering Stencil Bundle, that would make this a great card for any occasion!
If this is your first time visiting my blog, welcome and I hope you return. If you are a returning visitor, thank you so much for your support!
Should you have any questions or comments please leave them in the comments section. I'd love to hear from you and what you thought about today's card.
If you would like to be notified by email each time I post something new to my blog, you can click on the subscribe button at the top of the page. *Be sure to verify your subscription through the email link to activate. There is also a follow button that you can click on located below my profile if you would like to follow my blog.
Thank you for visiting and I hope you come back soon!
Happy Stamping and God bless!!
Jeannie
I love this card. The colors are beautiful.
ReplyDeleteThank you so much!! Gina has some amazing products!
DeleteGorgeous.....the simplicity combined with elegance make it perfect for a sympathy card!!
ReplyDeleteThank you Nina!!
DeleteAmazing card!
ReplyDeleteThank you Kathleen!!
DeleteCard is beautiful, colors are spot on, thanks for sharing..
ReplyDeleteThank you so much!!
DeleteThis is truly one of the most beautiful and unique cards I have seen recently. Love it! Thanks for sharing the steps!
ReplyDeleteThank you so much for your kind words!!
DeleteBeautiful card.
ReplyDeleteThank you so much!!
Delete