Hello, welcome to my blog!!
I want to start out by thanking everyone for the support and nice comments you all leave for me. I truly appreciate the support of this blog!! I enjoy card making and bringing my creations to you, this wouldn't be possible without your support, so again, thank you!! *Affiliate links are used at no additional cost to you. When you purchase products through my links I receive a small commission from these sales, thank you so much for your support, it is greatly appreciated!!
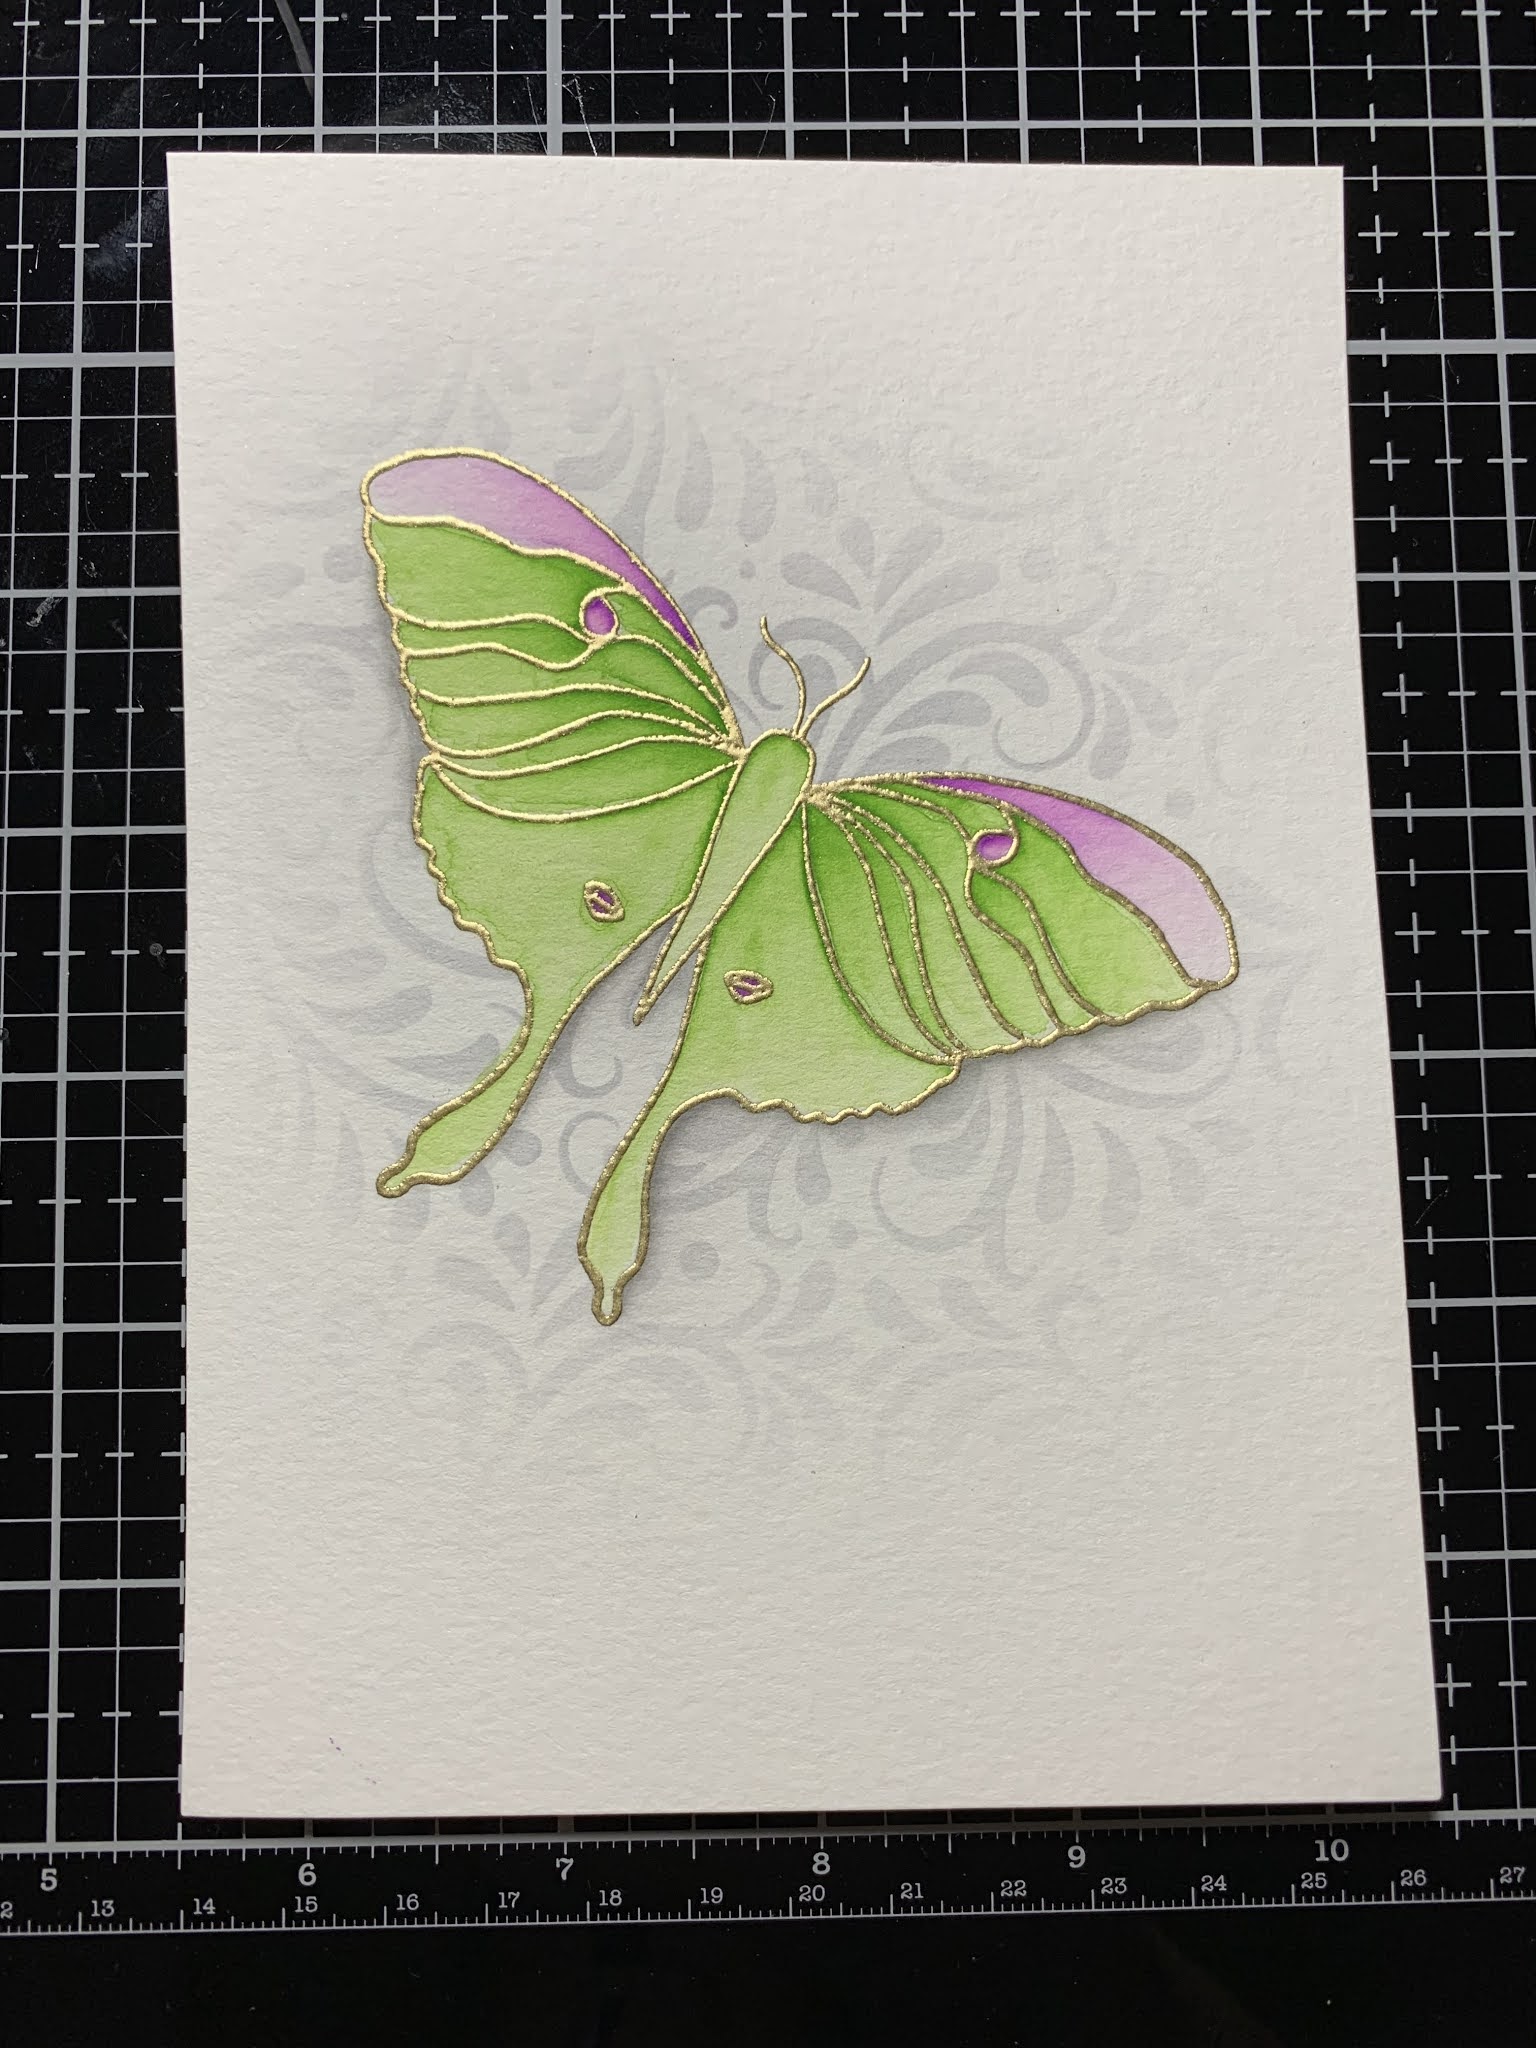
Today I have a card featuring the brand new stamp set from Gina K. Designs called, New Beginnings. I will be using the largest stamp from this set to create a watercolored image. There are coordinating dies for this set that I do not have, so I will show you a trick to create a dimensional look that looks as though this image was die cut. I want to give a shout out to Koren Wiskman as I was totally inspired by her coloring of this same Luna Moth from Gina's release. Her coloring reflected what this moth looks like in real life and I couldn't wait to try it for myself! If you haven't seen her card yet, go check out her YouTube channel. For my coloring I will be using Zig Clean Color Real Brush Markers on watercolor cardstock. I hope you had a chance to check out Gina's newest release, it is filled with so many beautiful stamp sets, a new Master Layouts die set and a fantastic new kit that is packed with many dies, three stamp sets and some beautiful colors of cardstock. If you've never purchased a kit from Gina K. Designs, you may want to check it out! Her kits are packed with so much product, and the value of these products are almost double the price of the kit. I cannot wait for my kit to arrive! I want to start out by saying there are a lot of photos in the post! When watercoloring, I like to photograph each step of my coloring process so I can better explain. Let's get started!!

I will be doing all of my work today on my Tim Holtz Glass Media Mat.
To start, I place a large piece of Watercolor Cardstock into my MISTI Stamp Positioner and prep it with my Anti Static Powder Bag. I then stamp an image from the New Beginnings Stamp Set onto the panel using Versamark Ink. I add Gold Embossing Powder and heat set with my Heat Tool. *Because of the texture of watercolor cardstock, I ended up stamping the image three times to get a good, crisp image.


I will be using my Zig Clean Color Real Brush Markers to do my coloring. I start by adding a small amount of Light Green RB-6000AT-041 to one of the areas of the first wing. I then take my Water Brush filled with clean water and blend the color out to the end of that section. I repeat this process with this color for each section of the wing, except for the very top section and the spots.


To deepen up the color a bit I go back and add another layer of color, repeating the same process, keeping the color a little darker where the wings meet the body of the moth.


I then move on to the lower wings. Using the same Light Green RB-6000AT-041 I lay down color at the top portion of the wing where the upper and lower wings overlap. I use my Water Brush to blend out the color. I repeat the process for the second lower wing then again go back and add another layer to deepen the color a bit.


I finish up with my Light Green RB-6000AT-041 color by adding a little to the top of the moth's body. I then use my Water Brush and blend out the color.


I now add Light Violet RB-6000AT-081 to the top section of the first wing then blend it out with my Water Brush. I repeat the process for the second wing then add another layer of color to both wings to deepen the color a bit. I also add this color to the four spots on the wings then blend with my Water Brush.


Now for the trick to make my moth look as though it was die cut and mounted on the card. I take my Light Gray RB-6000AT-091 and add it to the inside of the lower left wing edge and body onto the white area of cardstock. I then blend out the ink using my Water Brush. I add this shading wherever I think the light source would cast a shadow, along the right side of the wings as well as the left edge of the upper left wing. I am not at all a shadow expert but I was happy with the results and felt that the shading gave the illusion of the moth sitting on top of the cardstock.


I want to add some stenciling to my background but not to the moth. I place a piece of Masking Magic into my MISTI and stamp the same moth image onto it. I then use my Micro Tip Scissors and fussy cut the image, cutting on the black lines. *When ink blending a masked image, it is important to cut directly on the outline of the image or even on the very inside of the lines to avoid creating a "halo" around the image. This way the mask covers only the image and allows the ink blending to meet right up against the outlines of the image. Any overhang from the masking paper will create a halo around the image.


I remove the release paper from the back of the mask then adhere it over my watercolored image. Next, I place the Harvest Flourish Stencil over my panel and adhere down. I then use my Blending Brush (Yay, they are back in stock!!) to blend Soft Stone Ink around my image and fade out to white towards the edges of the panel. Once my blending is complete, I carefully remove the mask.


Using the second largest die from the Master Layouts 1 Die Set, I center it over my image leaving enough room at the lower right portion as I know this is where I want to stamp my greeting and sentiment. I then run them through my Big Shot Die Cut Machine.


I decided I wanted to add a little something to my card front. There is a beautiful stamp from the set that I thought would be perfect to add as though the moth was leaving a sparkly trail behind. I take the same mask that I created earlier and place it back over my watercolored image. I then place the panel back into my MISTI and prep it with my Anti Static Powder Bag. I line up the star trail stamp from the New Beginnings Stamp Set and place it over the image so that only the lower portion of this stamp makes contact on the panel. I then stamp it with Versamark Ink, add Gold Embossing Powder and heat set with my Heat Tool. I now remove the mask and stick it to the acetate of the stamp set for future use.


Now it's time to stamp my greeting and sentiment. Taking the greeting from the New Beginnings Stamp Set I stamp my panel using Amalgam Obsidian Ink. I then line up the sentiment from the same stamp set just under the greeting and stamp it also with Amalgam Obsidian Ink. I set the panel aside for a few minutes to let the ink dry while I work on the rest of the card.


Taking the layer die from the Master Layouts 1 Die Set I cut out of White Cardstock, running them through my Big Shot. To accent the gold in the stamped images I decided to add the same embossing powder to the edges of the layered panel. Using my Versamark Ink pad, I press onto all four edges of the panel, add Gold Embossing Powder then heat set with my Heat Tool.


Using Terrific Tape I adhere my watercolored panel onto the gold embossed panel. I then place a 4 1/4" x 11" piece of Key Lime Cardstock into my Scor Buddy and score it at 5 1/2" creating a top folding card base. To create a little dimension I add Foam Tape to the back of the panel then mount it onto the card base.


To finish I use my Jewel Picker to add a few Dew Drops using Liquid Glue and this completes my card.

I hope you enjoyed today's card, I love the colors of this card... and to think there is actually a moth out there with these beautiful colors!! I love using my Zig markers for coloring as they are so vibrant! The more layers of ink you lay down the brighter the colors become. Watch for more cards from me using sets from Gina's new release, I am very much looking forward to creating with the new kit along with those new Master Layouts set!!
If this is your first time visiting my blog, welcome and I hope you return. If you are a returning visitor, thank you so much for your support!
Should you have any questions or comments please leave them in the comments section. I'd love to hear from you and what you thought about today's card.
If you would like to be notified by email each time I post something new to my blog, you can click on the subscribe button at the top of the page. *Be sure to verify your subscription through the email link to activate. There is also a follow button that you can click on located below my profile if you would like to follow my blog.
Thank you for visiting and I hope you come back soon!
Happy Stamping and God bless!!
Jeannie
Stunning card & wonderful tutorial.
ReplyDeleteThank you so much Anna!!
DeleteSuch a beautiful card. Your directions for creating this stunner is second to none. Thank you for sharing your talent with us.
ReplyDeleteThank you so much Sheree!! I am please that you enjoyed the tutorial. I try to be as detailed and descriptive as I can. :)
Delete