Hello, welcome to my blog!!
I want to start out by thanking everyone for the support and nice comments you all leave for me. I truly appreciate the support of this blog!! I enjoy card making and bringing my creations to you, this wouldn't be possible without your support, so again, thank you!!
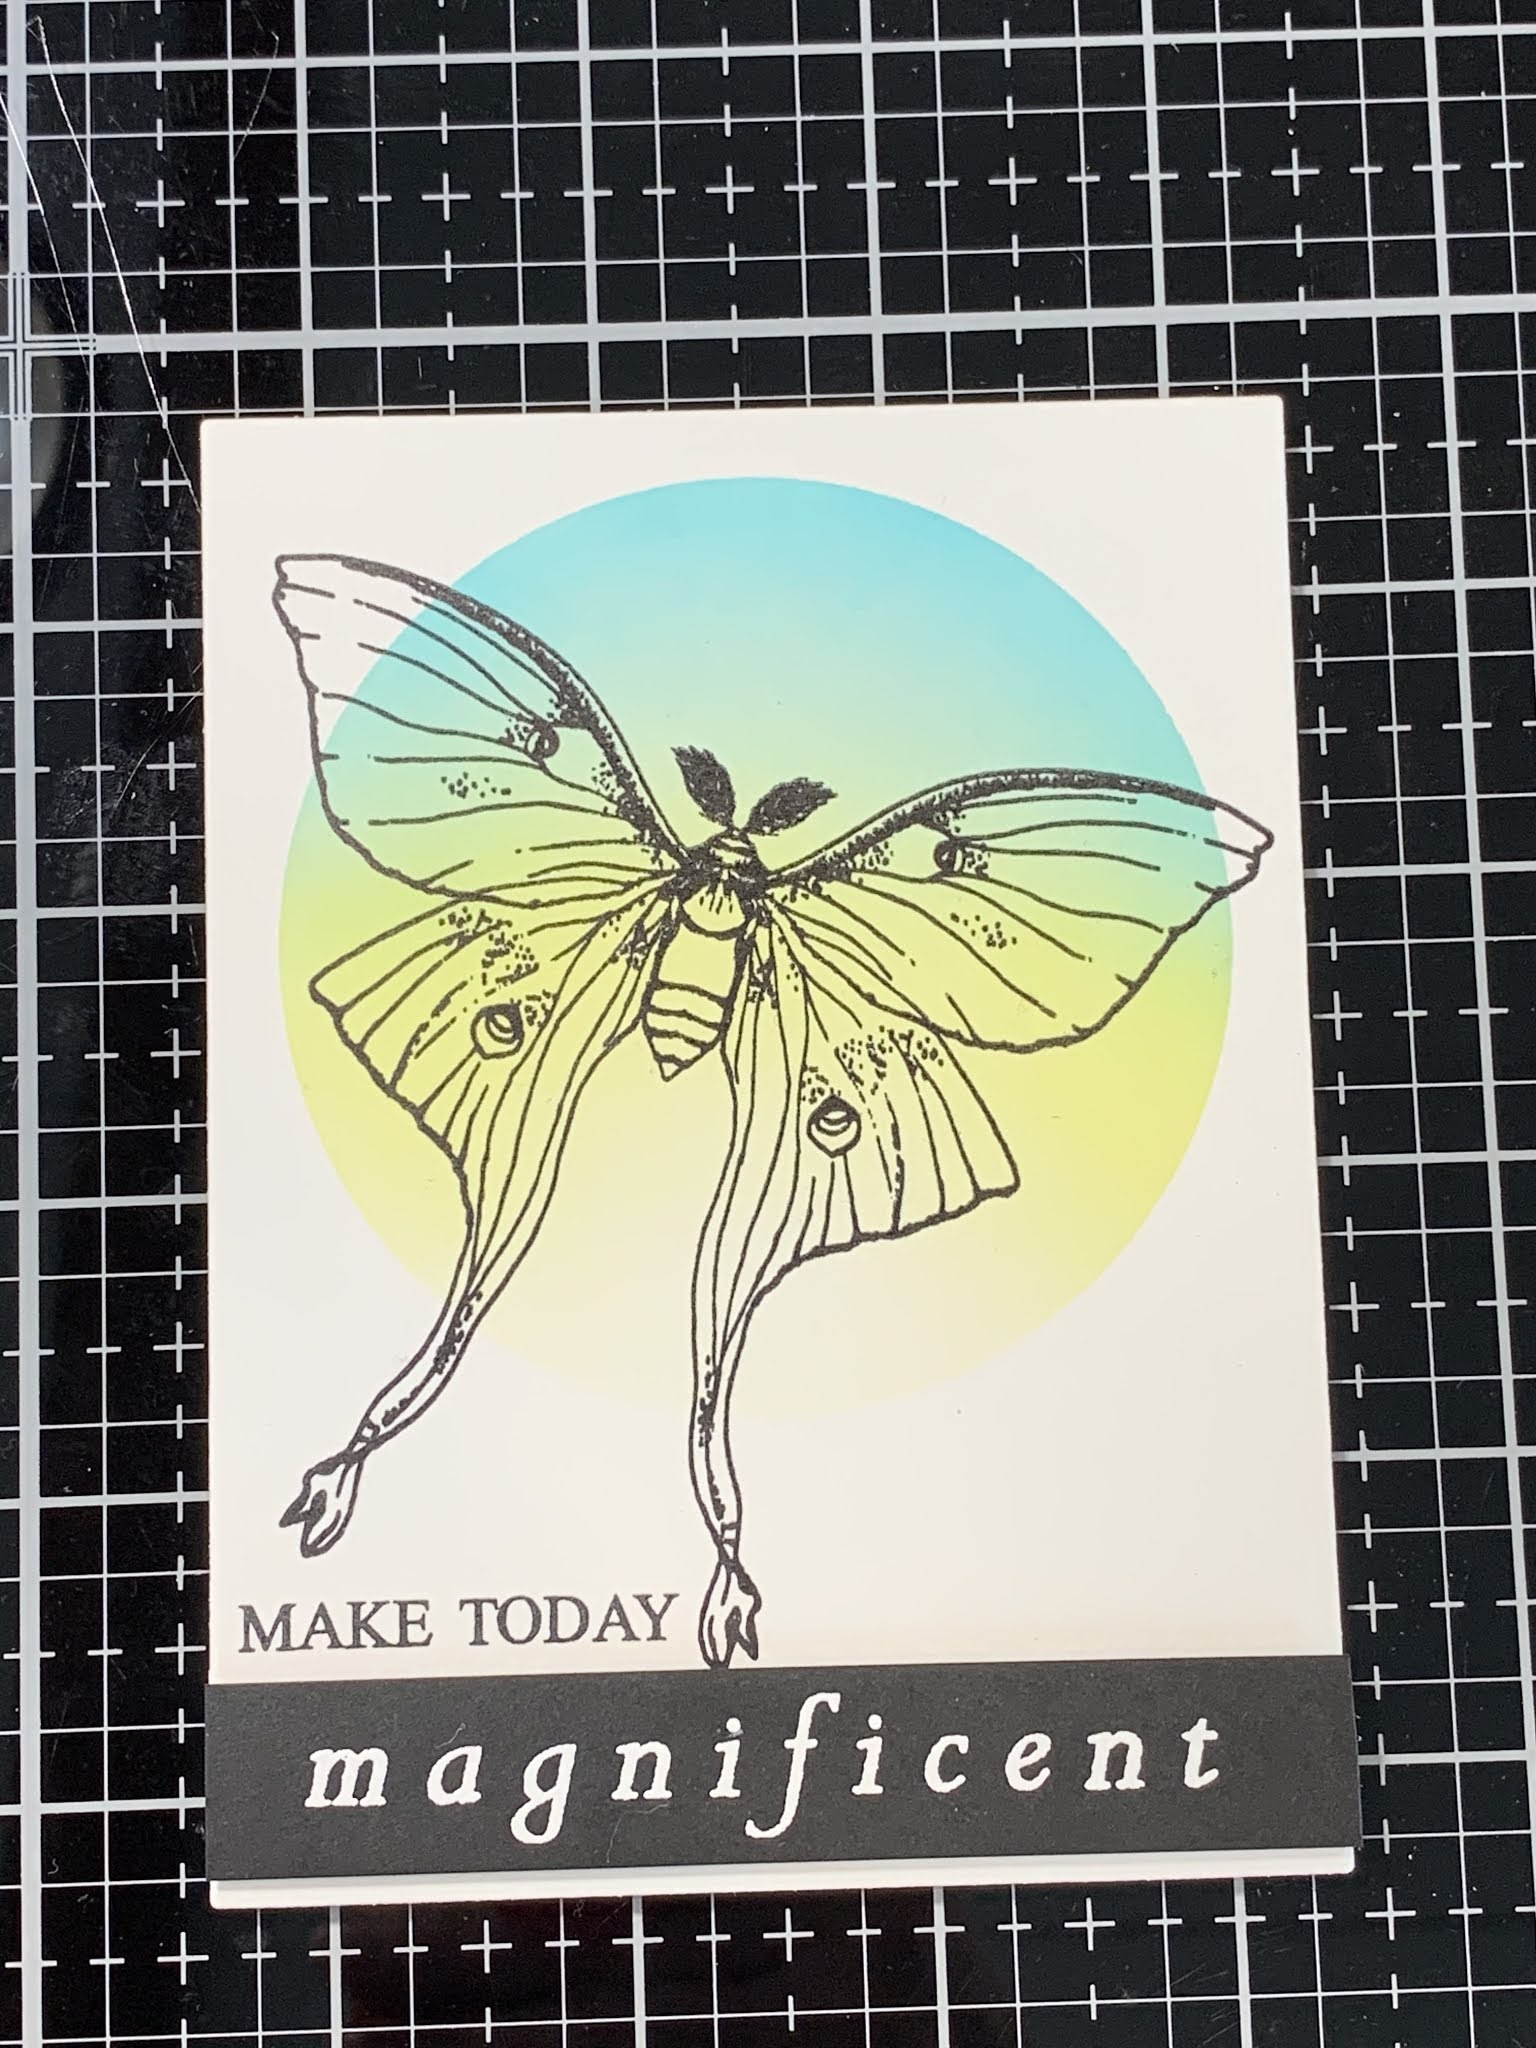
Today is the day!! Gina K. Designs new release goes live tonight at 7:00pm CST. Gina has several new stamp sets debuting tonight as well as a brand new layering stencil bundle! New items will be added to Gina's online store starting at 7:00pm CST, if you would like to check these out you can click on the store logo located on the lower right side of my blog that takes you directly to her store. The new release items can be found under the "What's New" tab. Gina will also be doing a live presentation of the new release. During her live she will be talking with the illustrators, showing samples and even creating a card at the end with one of the new sets. *If you miss the live presentation you can always watch the replay. Today, I am creating a card using the Magnificent Moths stamp set illustrated by Melanie Muenchinger! This set is a continuation to her Beautiful Butterflies and Beautiful Wings stamp sets. Magnificent Moths is a large 6 x 8 stamp set that is full of beautiful detailed images of moths, both large and small as well as encouraging sentiments, also included are a couple of flower stamps. These images can be colored, embossed or used as I did for today's card, stamped over a blended background. There is also a coordinating die set available for purchase. All of the stamps, inks and cardstock I use today are from Gina K. Let's get started!!

I will be doing all of my work today on my Tim Holtz Glass Media Mat.
To start, I take a die from the Infinity Circles Die Set and cut out of a 4 1/4" x 5 1/2" piece of Masking Magic, running them through my Big Shot Die Cut Machine. I then remove the release paper and place the mask over a 4 1/4" x 5 1/2" panel of White Cardstock and adhere down.


Using my Blending Brushes I blend Key Lime Ink over the center portion of the masked area, fading out towards the bottom to almost white. I also fade out a bit towards the top to join my next color. I then blend Sea Glass Ink over the top of the masked area, fading back into the previous color a bit. *To avoid harsh lines I tap my brush onto the mask to remove a little color before bringing it to my panel.


For a little depth and contrast I blend Blue Lagoon Ink over the very top edge of my previous color. I then go back through each color to intensify a bit and blend.


Now that my blending is complete I carefully remove the mask. Next, I take the second biggest die from the Master Layouts 1 Die Set and place it over my blended panel centering it so the blended circle is towards the top of the panel as I will be creating my sentiment towards the bottom. I then run them through my Big Shot.


I now place the blended panel into my MISTI Stamp Positioner then take an image from the Magnificent Moths Stamp Set and place it at an angle over my blended circle. I ink up the image with Amalgam Obsidian Ink and stamp it onto the panel.


Next, I place a piece of Black Cardstock into my MISTI and prep it with my Anti Static Powder Bag. I then choose a sentiment from the Magnificent Moths Stamp Set and stamp it using Versamark Ink, add White Embossing Powder then heat set with my Heat Tool.


Using my Tim Holtz Guillotine Paper Trimmer, I trim the sentiment into a strip then for some dimension I add Foam Tape to the back of it and mount it onto the lower portion of my panel. I trim off the sides making it flush with the panel then place the panel into my MISTI. I choose another sentiment from the Magnificent Moths Stamp Set and line it up just above the cardstock strip then stamp it using Amalgam Obsidian Ink.


Next, I place a piece of 4 1/4" x 11" Sea Glass Cardstock into my Scor Buddy and score it at 5 1/2" creating a top folding card base. I then use the biggest layering die from the Master Layouts 1 Die Set and cut out of Black cardstock, running them through my Big Shot. Using Liquid Glue I adhere my blended panel onto the black panel then onto the card base.


Using my Jewel Picker I add Dew Drops with Liquid Glue and this completes my card.

I hope you enjoyed today's card. I had fun playing with this stamp set and decided to go with a simple ink blend to highlight my image. I love when an image is big enough to cover most of a card front. It allows you to create a quick simple card like I chose to do. I love the look of a bold black outline image against bright or soft colors, such beautiful contrast! I will be back later in the week showcasing another new set from Gina's release, I hope you will return!
If this is your first time visiting my blog, welcome and I hope you return. If you are a returning visitor, thank you so much for your support!
Should you have any questions or comments please leave them in the comments section. I'd love to hear from you and what you thought about today's card.
If you would like to be notified by email each time I post something new to my blog, you can click on the subscribe button at the top of the page. *Be sure to verify your subscription through the email link to activate. There is also a follow button that you can click on located below my profile if you would like to follow my blog.
Thank you for visiting and I hope you come back soon!
Happy Stamping and God bless!!
Jeannie
Comments
Post a Comment