Hello, welcome to my blog!!
I want to start out by thanking everyone for the support and nice comments you all leave for me. I truly appreciate the support of this blog!! I enjoy card making and bringing my creations to you, this wouldn't be possible without your support, so again, thank you!!
Today I have created a card using the beautiful Flowers For You stamp set from Gina K. Designs. This is a gorgeous stamp set with a huge floral image along with many beautiful encouraging sentiments. The image from this set is perfect for any kind of coloring medium but today I will be using it with the alcohol ink lift technique. I love creating alcohol inked panels and thought this stamp would be great for the lift process! Turns out it was the perfect look that I was going for, it is so soft and beautiful! All of the stamps, die and cardstock (with the exception of Yupo) I use on today's card are from Gina K. Designs. Let's get started!!

I will be doing all of my work today on my Tim Holtz Glass Media Mat.
To start I cut a piece of Yupo Paper in half leaving me with a 5" x 8" panel. I start by adding Peach Bellini Alcohol Ink followed by Aqua Alcohol Ink. I then add a few drops of Gilded Alloy Alcohol Ink over the panel then add some Blending Solution over everything. Next, I use my Air Blower to move the inks around.


I decided I wanted a bit more color so I added a little more Peach Bellini Alcohol Ink and Aqua Alcohol Ink along with a little Blending Solution then again used my Air Blower to move the ink around.


After letting my panel completely dry for several minutes I added a little Adhesive Dot Runner to the back (to help keep it from moving) and place it into my MISTI Stamp Positioner to begin the lifting process. Next, I take the image from the Flowers For You Stamp Set and ink it up with my Alcohol Lift Ink pad and stamp it onto my panel. I then take a clean dry cloth (A paper towel can also be used) and gently blot up the ink from the panel. After the ink is blotted I then take the cloth and gently buff over the image.


Leaving the panel in place I repeat the inking, blotting and buffing a few times until I am satisfied with the vibrancy of the image. I then remove the panel and take a small paintbrush dipped into some 91% isopropyl rubbing alcohol and spatter my panel for some interest. *The rubbing alcohol is reactive to the alcohol ink and leaves beautiful droplets. *Remember to clean off your stamp before applying more lift ink so you do not contaminate your ink pad.


I now use my Tim Holtz Guillotine Paper Trimmer and cut the panel down to be 3 3/8" x 4 1/2". I also cut a 1 3/4" x 4" piece of Vellum using my Guillotine Paper Trimmer then place it into my MISTI and prep it with my Anti Static Powder Bag. Taking the large "You Are" sentiment from the Flowers For You Stamp Set, I line it up over my Vellum strip and stamp it with Versamark Ink. I then take a small sentiment from the same stamp set and line it up just under the previous sentiment and also stamp it onto the Vellum with Versamark Ink. I add White Embossing Powder over both images then heat set from the back side of the Vellum with my Heat Tool. ***I've had questions about getting a good embossed image using white embossing powder. To get a good crisp image I recommend using a juicy embossing ink pad and give good even pressure when stamping, being careful not to push too hard on the stamp. Use a good detail or fine embossing powder to add over the image and tap off the excess powder. Then go back and add the powder over the image again and gently shake or tap the cardstock/vellum so that the granules of powder can get into any missed inked areas then tap off the excess powder and heat set.


To attach the Vellum to my panel I add Terrific Tape to the back of each end, line up the sentiment then bend the ends around the panel and adhere to the back.


Taking the scallop rectangle from the Master Layouts 4 Die Set I cut out of White Cardstock, running them through my Big Shot Die Cut Machine. I then add Terrific Tape to the back of the inked panel (making sure to add it over the vellum pieces also to help keep it secure) then adhere it within the stitched area of the scallop panel.


Next, I place a 4 1/4" x 11" piece of Sea Glass Cardstock into my Scor Buddy and score it at 5 1/2" creating a top folding card base. I then add Foam Tape to the back of my scallop panel and mount onto my card base.


Using my Jewel Picker I add a few Dew Drops with Liquid Glue to the card front and this completes my card.
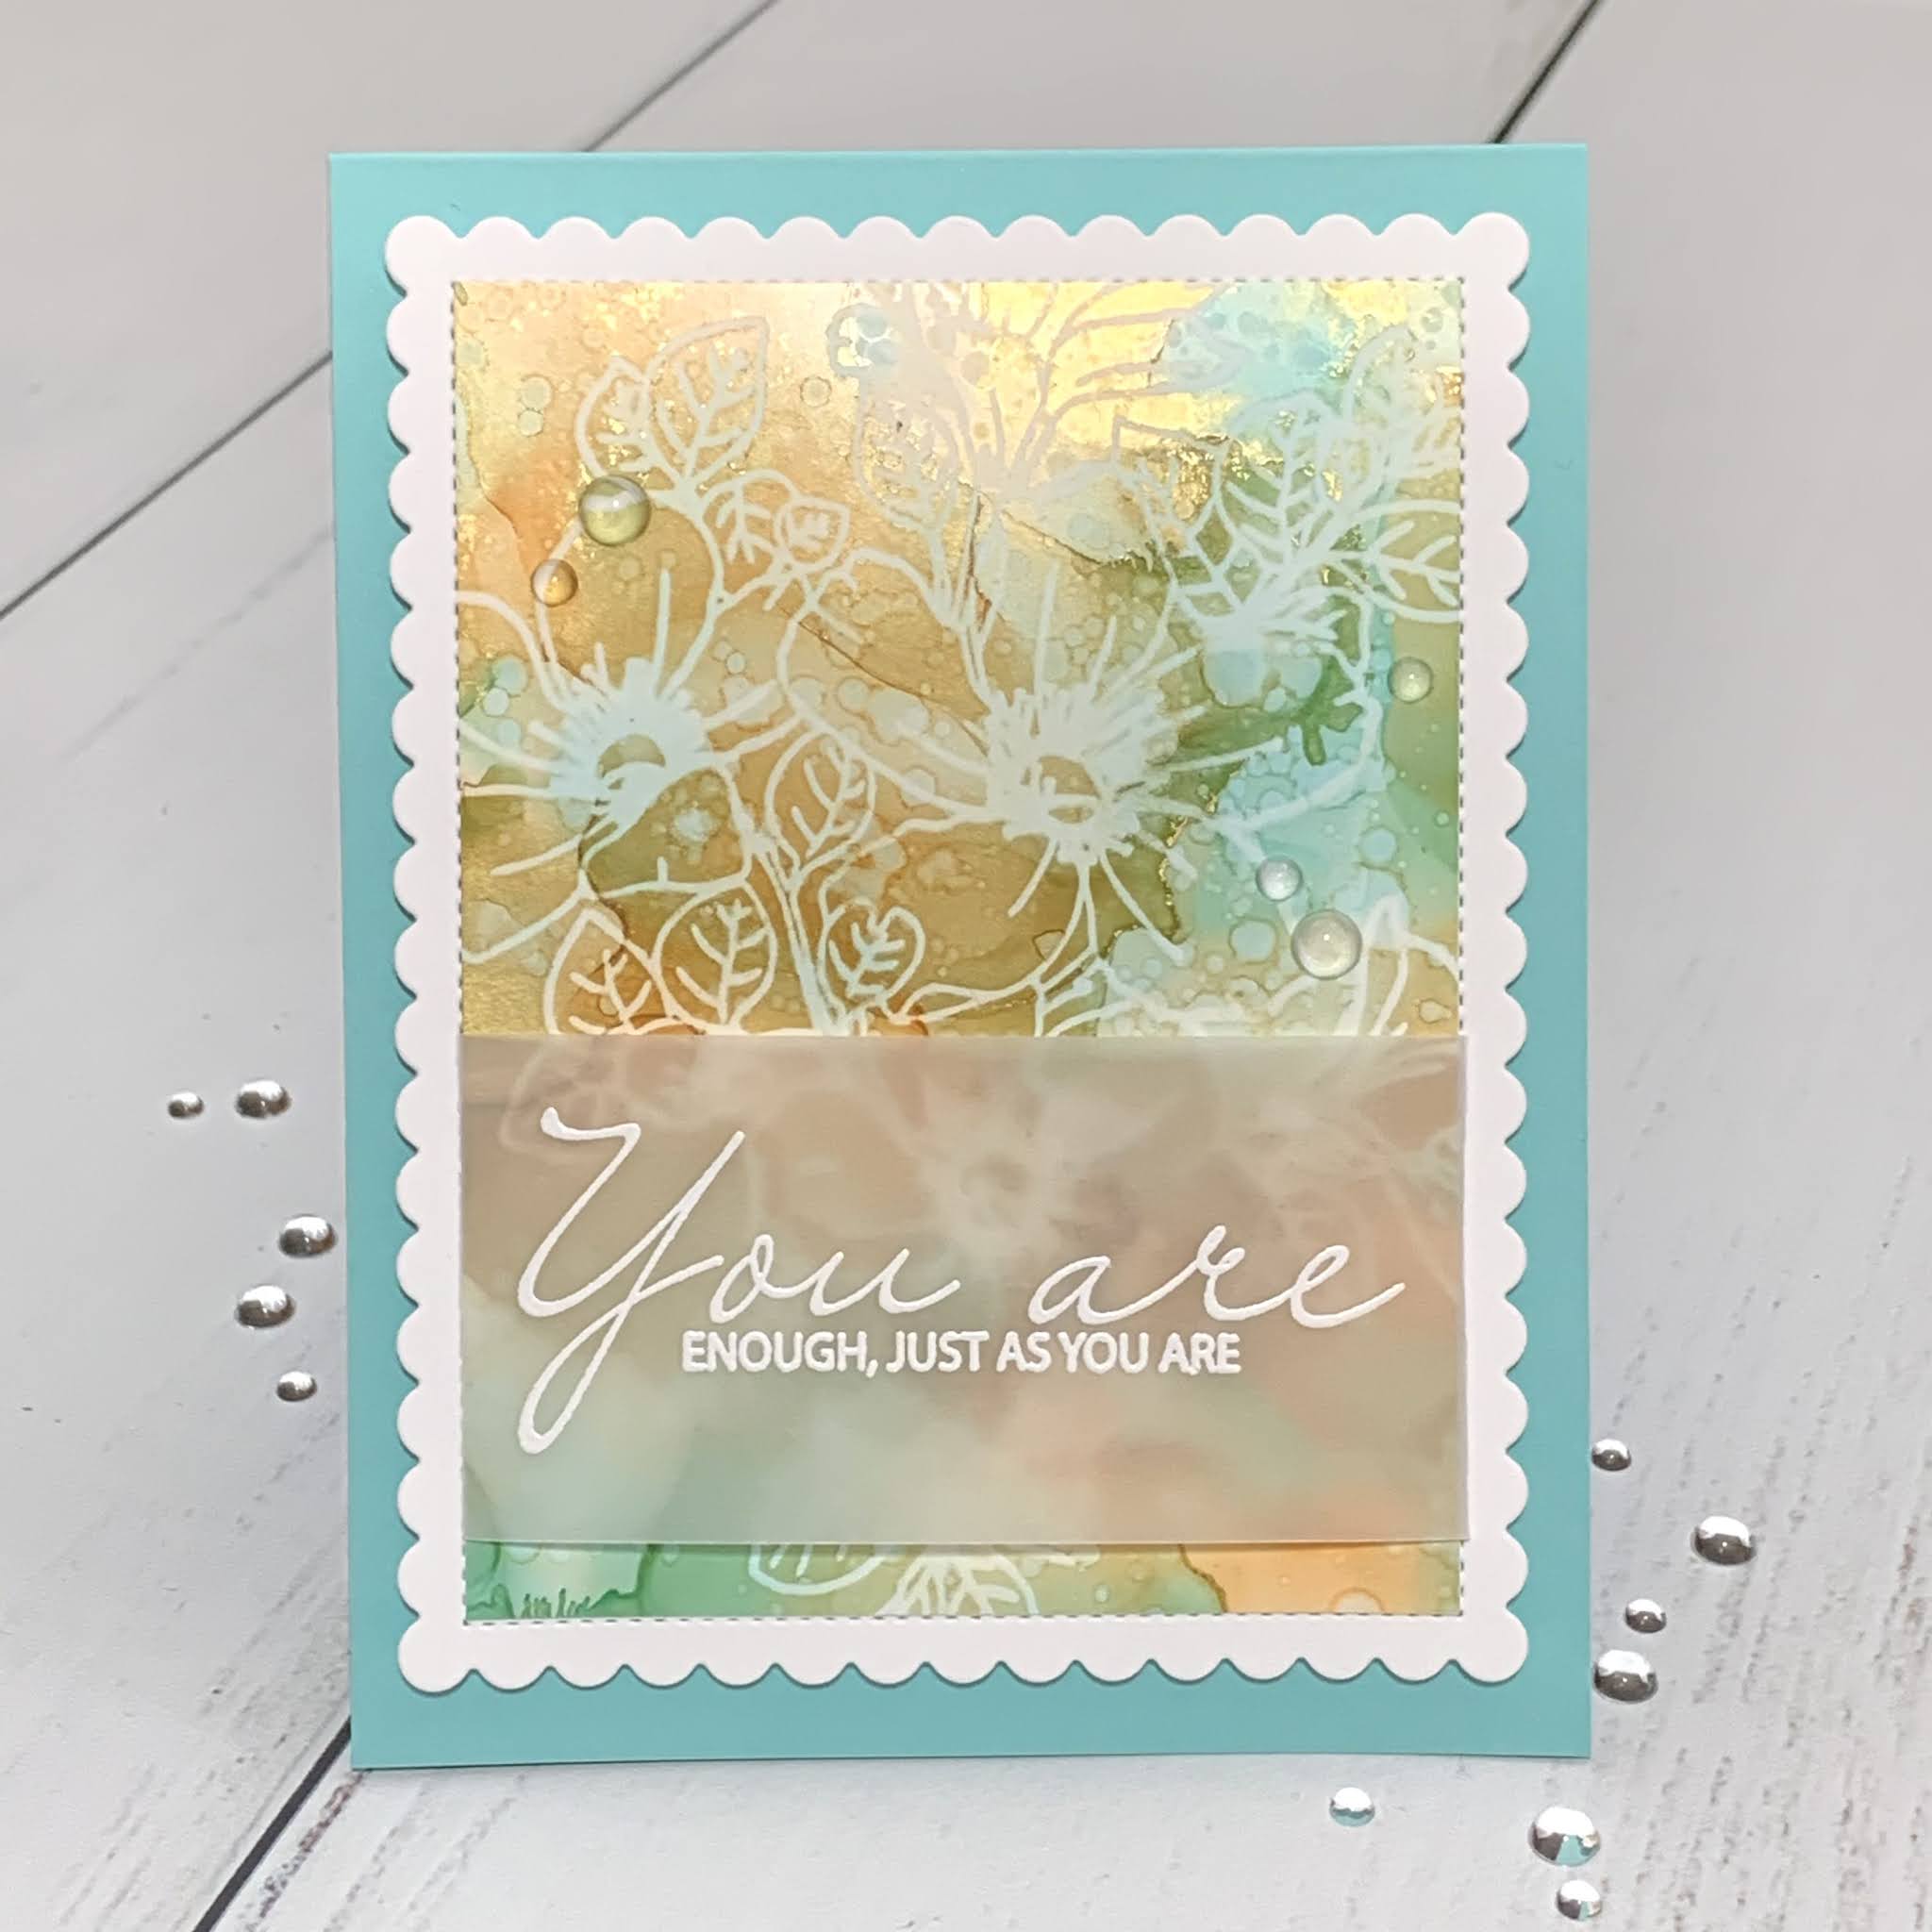
I hope you enjoyed today's card. I really love the results I achieved using this image with the alcohol ink lift technique. Adding in the alloy to any color(s) of alcohol ink really steps up the look of the blend leaving it with a touch of elegance. It's a bit hard to capture in photos, but there is a lot of gold leafing and shimmer from the alloy on this panel. I really love the color combination against the Sea Glass cardstock, it ended up matching perfectly!!
If this is your first time visiting my blog, welcome and I hope you return. If you are a returning visitor, thank you so much for your support!
Should you have any questions or comments please leave them in the comments section. I'd love to hear from you and what you thought about today's card.
If you would like to be notified by email each time I post something new to my blog, you can click on the subscribe button at the top of the page. *Be sure to verify your subscription through the email link to activate. There is also a follow button that you can click on located below my profile if you would like to follow my blog.
Thank you for visiting and I hope you come back soon!
Happy Stamping and God bless!!
Jeannie
This is a spectacular card! I have lift, but didn't do it properly and never tried again. You have made me a believer. Lift here I come....
ReplyDeleteThank you so much Cheryl!! Have fun!!
DeleteThis is simply gorgeous. I love the colors you chose.
ReplyDeleteThank you so much Judy!!
Delete